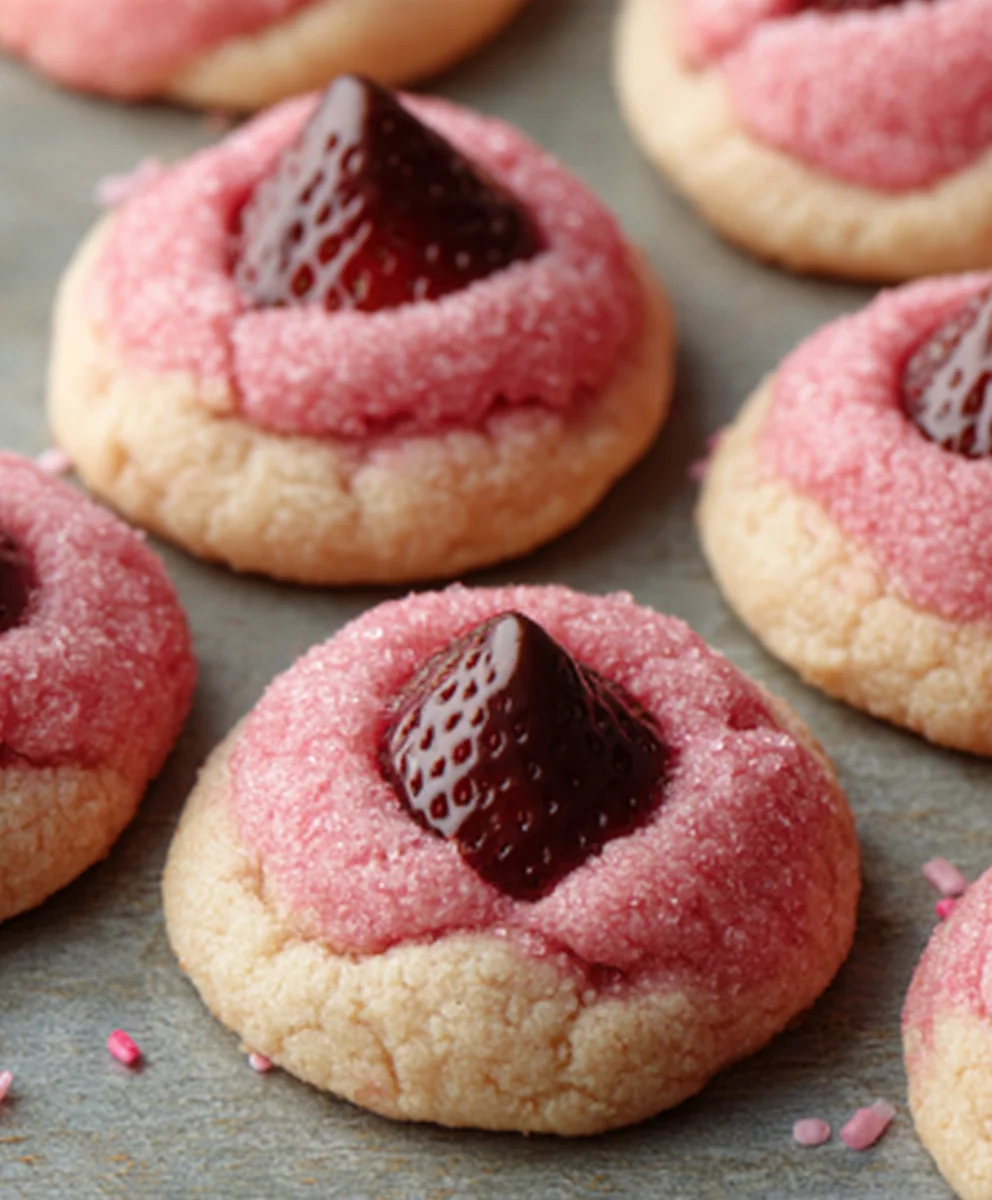
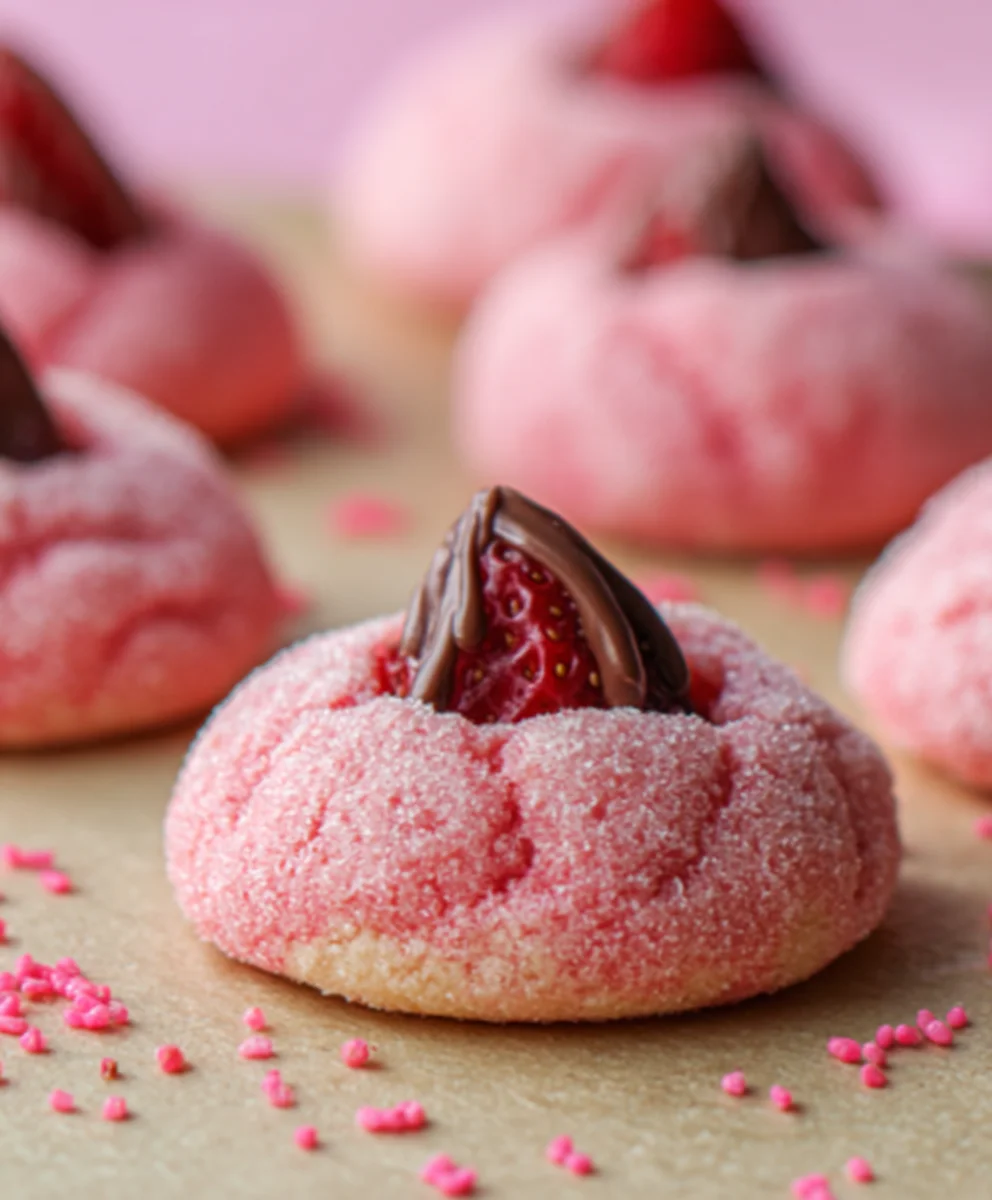
Strawberry Kiss Cookies-Sweet & Easy Homemade Treat
Strawberry Kiss Cookies are more than just a sweet treat; they’re tiny bursts of sunshine and pure joy, perfect for any occasion, from a simple afternoon pick-me-up to a festive celebration. What is it about these delightful confections that captures our hearts and taste buds so effectively? Perhaps it’s the delicate balance of sweet, buttery cookie dough embracing a jewel-toned strawberry center, a combination that’s both classic and irresistibly charming. The gentle sweetness of ripe strawberries, whether fresh or transformed into a jammy filling, pairs harmoniously with the tender crum extractb of the cookie, creating a bite that’s simply divine. People love Strawberry Kiss Cookies because they evoke a sense of nostalgia, reminding us of simpler times and homemade goodness, while their elegant appearance makes them feel wonderfully special, a perfect little gift of love to share.
The Magic Behind Strawberry Kiss Cookies
There’s an undeniable magic in a perfectly baked Strawberry Kiss Cookie. It’s not just the visually appealing contrast of the pnon-alcoholic ale cookie and the vibrant red filling, but the way the flavors meld together. The slight tang of the strawberry cuts through the richness of the cookie, preventing it from being overly sweet. What truly makes them special is the texture – a soft, melt-in-your-mouth cookie that gives way to a wonderfully gooey, slightly tart strawberry surprise. Each bite is a delightful experience, a miniature masterpiece that feels both comforting and sophisticated. Imagin extracte sharing these with loved ones, the smiles they bring, the shared moments of pure, unadulterated delight. They’re a testament to how simple ingredients, prepared with care, can create something truly extraordinary.
Ingredients:
- 1 box (15.25 oz) strawberry cake mix
- 8 tablespoons (1/2 cup) butter, melted and slightly cooled
- 1 large egg
- 4 ounces cream cheese, softened
- Optional: powdered sugar or pink granulated sugar for rolling
- 30 chocolate Hershey’s Kisses, unwrapped
Strawberry Kiss Cookie Dough
The foundation of our delightful Strawberry Kiss Cookies lies in a simple yet flavorful dough. We’ll leverage the convenience of a strawberry cake mix to impart that beautiful color and a hint of fruity sweetness right from the start. To this, we add essential elements for texture and richness. Ensure your butter is melted but not hot; a slightly cooled temperature will help it incorporate smoothly without scrambling the egg. Softened cream cheese is crucial here – it contributes to a wonderfully tender cookie and a slightly chewy texture, a delightful contrast to the crisp exterior.
Forming the Cookies and Adding the Kiss
This is where the magic truly happens, transforming simple dough into a festive treat. We’ll be creating small, manageable dough balls and then gently pressing them to create a cozy nest for our Hershey’s Kiss. Taking your time during this stage ensures that each cookie has a perfectly formed crater, ready to embrace its chocolatey crown. The gentle shaping also helps prevent the cookies from spreading too much during baking, maintaining a pleasant thickness.
Baking and Cooling
The final stages involve baking the cookies to a golden-brown perfection and allowing them to cool properly. Proper cooling is paramount not just for handling but also for allowing the flavors to meld and the texture to set. Rushing this process can lead to cookies that are too soft or crum extractble easily.
Detailed Step-by-Step Instructions
-
Preheating and Dough Preparation
Begin extract by preheating your oven to 350 degrees Fahrenheit (175 degrees Celsius). Line baking sheets with parchment paper or silicone baking mats. This prevents sticking and makes for easier cleanup. In a large mixing bowl, combine the entire box of strawberry cake mix, the melted and slightly cooled butter, and the large egg. Mix these ingredients until they are just combined to form a thick dough. Be careful not to overmix, as this can lead to tougher cookies. The dough will be quite sticky at this stage, which is perfectly normal.
-
Incorporating the Cream Cheese
Now, add the softened cream cheese to the bowl with the cake mix dough. Using a sturdy spoon or a stand mixer fitted with a paddle attachment on low speed, carefully incorporate the cream cheese into the dough. Continue mixing until the cream cheese is fully blended and the dough becomes smoother and less sticky, forming a cohesive ball. The cream cheese will create a rum extractder crumb. Once combined, cover the bowl with plastic wrap and refrigerate the dough for at least 30 minutes. This chilling period is vital; it makes the dough much easier to handle and helps the cookies maintain their shape during baking.
-
Shaping the Cookies and Nesting the Kisses
Once the dough has chilled sufficiently, it’s time to shape the cookies. You can lightly dust your hands with flour if the dough still feels a bit too sticky, but aim for minimal flour. Scoop about 1 tablespoon of dough for each cookie and roll it into a ball. If you are using optional powdered sugar or pink granulated sugar, now is the time to roll each dough ball in your chosen coating until evenly covered. Place the dough balls about 2 inches apart on the prepared baking sheets. Once the balls are formed and rolled (if applicable), gently press the top of each dough ball with your thumb or the back of a small spoon to create a slight indentation. This indentation will serve as the perfect spot to place your Hershey’s Kiss.
-
Adding the Chocolate Kiss and Baking
Carefully unwrap your 30 chocolate Hershey’s Kisses. Place one unwrapped Hershey’s Kiss into the indentation you created on each dough ball. Gently press down on the Kiss so it is nestled into the dough. The heat from the ovengin extractll begin to melt the Kiss and create that iconic look. Place the baking sheets into the preheated oven. Bake for 9 to 12 minutes, or until the edges of the cookies are lightly golden brown and the centers appear set. The exact baking time will depend on your oven and the size of your cookies, so keep a close eye on them. You want them baked through, but not overdone.
-
Cooling and Finishing Touches
This is a critical step for the perfect texture and appearance. Once baked, remove the baking sheets from the oven. The Hershey’s Kiss will have melted and spread slightly. Allow the cookies to cool on the baking sheets for 5 to 10 minutes. During this time, the melted chocolate will firm up slightly, and the cookies will become more stable. After this initial cooling period, use a thin spatula to carefully transfer the Strawberry Kiss Cookies to a wire rack to cool completely. As they cool, the dough will set further, resulting in a delightful chegrape juicess. If desired, you can gently press the Kiss again with a warm utensil while the cookie is still warm if it hasn’t fully sunken into the dough, but be very careful not to break the cookie.
Conclusion:
And there you have it! Your very own batch of delicious Strawberry Kiss Cookies, ready to impress and delight. These charming cookies are the perfect blend of sweet, slightly tart strawberries and a tender, melt-in-your-mouth texture. We’ve walked through each step, from selecting the ripest strawberries to achieving that perfect kiss shape, and I encourage you to try this recipe for yourself. They are surprisingly easy to make and offer a wonderful homemade treat that’s perfect for any occasion, from a casual afternoon tea to a special celebration.
For serving, these Strawberry Kiss Cookies are delightful on their own, but they also pair beautifully with a glass of cold milk, a cup of herbal tea, or even a sparkling rosé. Consider decorating them further with a light dusting of powdered sugar or a drizzle of white chocolate for an extra touch of elegance.
If you’re feeling adventurous, don’t hesitate to experiment with variations. You could add a pinch of lemon zest to the dough for a brighter citrus note, or substitute a portion of the strawberries with raspberries for a mixed berry flavor. You could also try different shapes; why not heart-shaped cookies for Vnon-alcoholic alentine’s Day?
Don’t be afraid to get your hands a little messy and enjoy the process. Baking should be fun, and the reward of these delightful Strawberry Kiss Cookies is well worth the effort. I can’t wait to hear how yours turn out!
Frequently Asked Questions:
Q1: Can I use frozen strawberries for Strawberry Kiss Cookies?
While fresh strawberries are ideal for the best flavor and texture, you can use frozen strawberries. Ensure they are thoroughly thawed and drained of excess moisture before incorporating them into the dough. You may need to pat them dry with a paper towel to prevent the dough from becoming too wet.
Q2: How should I store Strawberry Kiss Cookies?
Store your Strawberry Kiss Cookies in an airtight container at room temperature. They should stay fresh and delicious for up to 3-4 days. If you have excess moisture from the strawberries, they might soften slightly over time, but they will still be very enjoyable.
Strawberry Kiss Cookies-Sweet & Easy Homemade Treat
Delightful and easy-to-make strawberry cookies with a Hershey’s Kiss in the center. Perfect for any occasion!
Ingredients
-
1 box (15.25 oz) strawberry cake mix
-
1/2 cup butter, melted and slightly cooled
-
1 large egg
-
4 ounces cream cheese, softened
-
30 chocolate Hershey’s Kisses, unwrapped
-
Optional: powdered sugar or pink granulated sugar for rolling
Instructions
-
Step 1
Preheat oven to 350°F (175°C). Line baking sheets with parchment paper. In a large bowl, combine strawberry cake mix, melted butter, and egg until just combined into a thick dough. Do not overmix. -
Step 2
Add softened cream cheese to the dough. Mix until fully blended and the dough forms a cohesive ball. Cover and refrigerate for at least 30 minutes to make the dough easier to handle. -
Step 3
Scoop about 1 tablespoon of dough for each cookie and roll into a ball. If using optional sugar, roll the balls in it. Place dough balls about 2 inches apart on prepared baking sheets. Gently press the top of each ball with your thumb to create a slight indentation. -
Step 4
Place one unwrapped Hershey’s Kiss into the indentation of each dough ball and gently press down to nestle it in. Bake for 9 to 12 minutes, or until the edges are lightly golden brown and the centers appear set. -
Step 5
Remove baking sheets from the oven. Let cookies cool on the sheets for 5 to 10 minutes. Carefully transfer cookies to a wire rack to cool completely. The melted chocolate will firm up as they cool.
Important Information
Nutrition Facts (Per Serving)
It is important to consider this information as approximate and not to use it as definitive health advice.
Allergy Information
Please check ingredients for potential allergens and consult a health professional if in doubt.