Old School Chocolate Traybake Cake Recipe
Old School Chocolate Traybake Cake is more than just a dessert; it’s a delicious trip down memory lane. There’s a reason why this wonderfully simple yet incredibly satisfying cake holds such a special place in so many hearts. It evokes memories of childhood, of school fairs, of birthday parties where this unfussy, deeply chocolatey delight was always the star. People adore the Old School Chocolate Traybake Cake for its comforting familiarity and its utterly craveable fudgy texture that melts in your mouth. What truly makes this particular Old School Chocolate Traybake Cake special is its incredible ease of preparation. You don’t need fancy equipment or intricate techniques; just a few basic pantry staples and a willingness to embrace pure, unadulterated chocolatey joy. It’s the perfect bake for novice bakers and seasoned pros alike, promising a consistently delicious result every single time. Prepare to be amazed by how something so straightforward can deliver such profound flavour and comfort.
Ingredients:
- 1 cup (2 sticks) unsalted butter, softened to room temperature
- 1¼ cups granulated sugar
- 1 teaspoon pure vanilla extract
- 4 medium eggs, at room temperature
- 1¾ cups self-raising flour
- ¼ cup unsweetened cocoa powder
- 3 tablespoons whole milk
- 1½ cups powdered sugar, sifted
- 1 tablespoon unsweetened cocoa powder
- 2 tablespoons milk
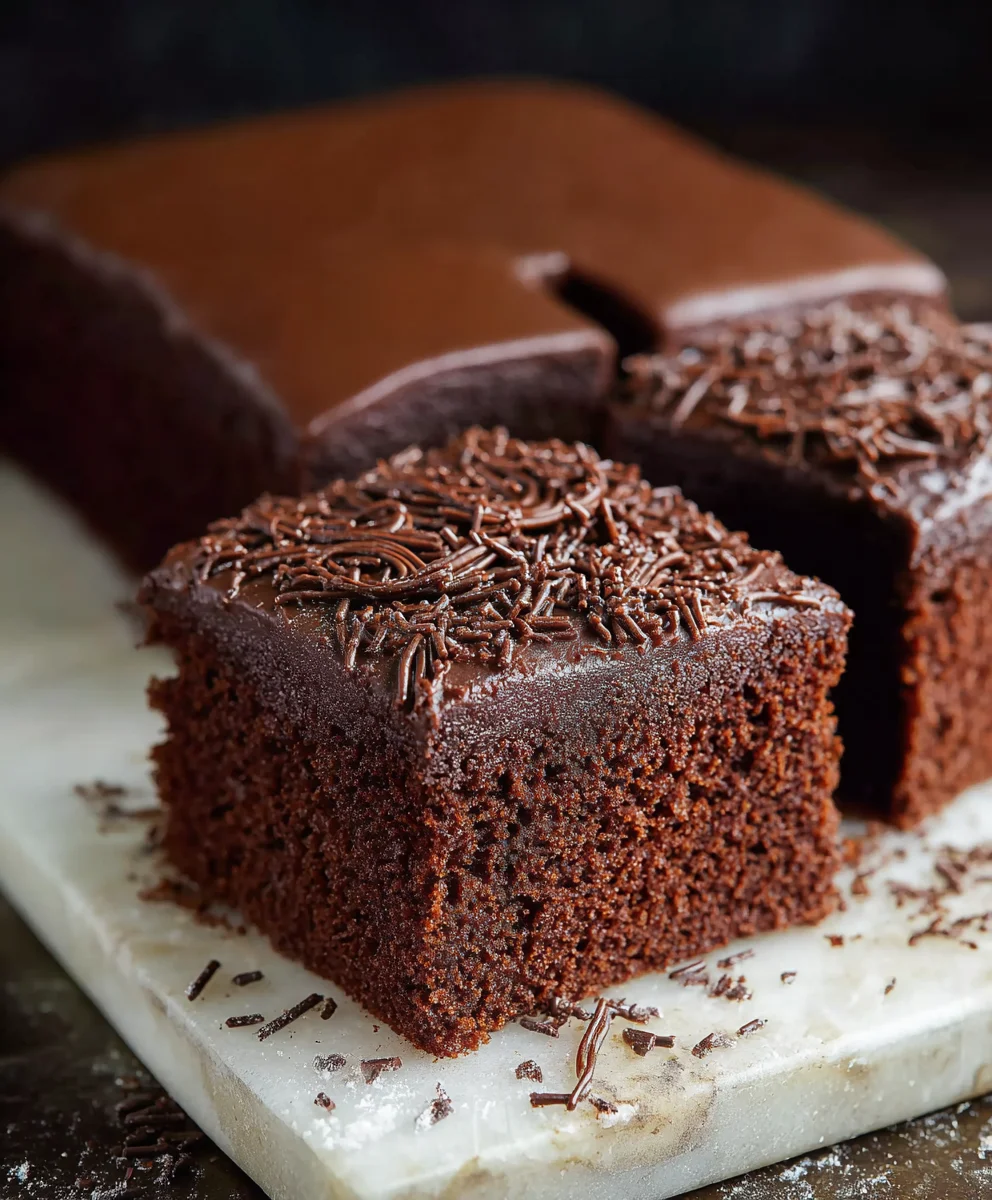
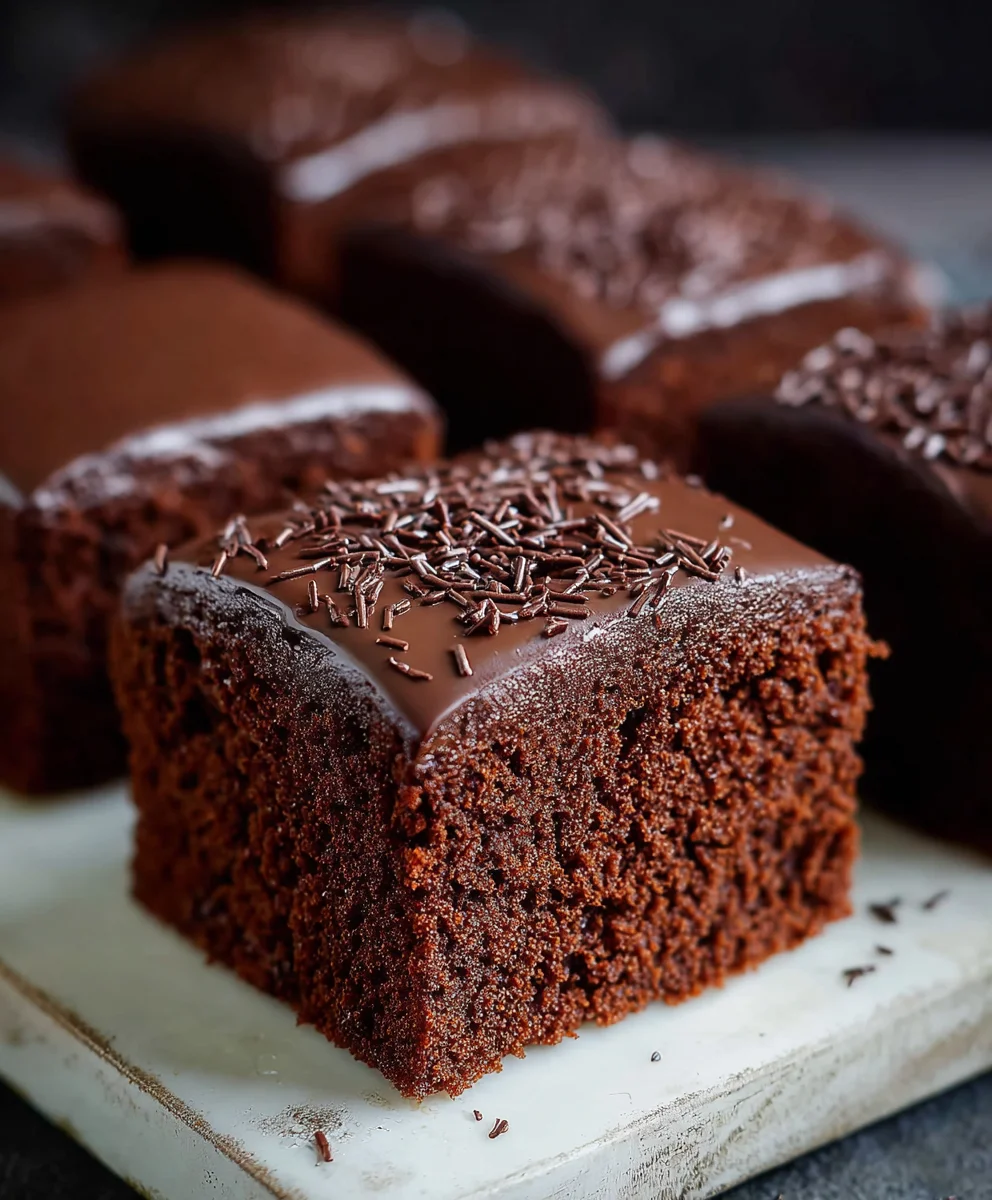
- Chocolate sprinkles for decorating
Old School Chocolate Traybake Cake: The Baking Process
This Old School Chocolate Traybake Cake is a timeless classic, perfect for birthdays, afternoon tea, or just a comforting treat. It’s wonderfully moist, intensely chocolatey, and incredibly easy to make. The beauty of a traybake is its simplicity – no fancy tins, no complicated layering, just pure, unadulterated chocolate goodness baked in a single layer. Let’s get started on creating this delightful cake.
Making the Cake Batter
Step 1: Creaming the Butter and Sugar
To begin extract, we need to create a light and airy base for our cake. In a large mixing bowl, combine the 1 cup of softened unsalted butter with 1¼ cups of granulated sugar. Using an electric mixer on a medium speed, cream these two ingredients together until the mixture is pnon-alcoholic ale yellow and fluffy. This process, known as creaming, is crucial for incorporating air into the batter, which will contribute to the cake’s tender texture. Scrape down the sides of the bowl with a spatula periodically to ensure all the butter and sugar are evenly incorporated. You’re looking for a consistency that’s light and almost like whipped cream.
Step 2: Adding the Eggs and Vanilla
Once your butter and sugar are perfectly creamed, it’s time to introduce the wet ingredients. Add the 4 medium eggs, one at a time, beating well after each addition. It’s important that your eggs are at room temperature; cold eggs can cause the butter to seize and create a greasy texture. If your eggs are cold, you can quickly warm them by placing them in a bowl of warm water for a few minutes. After each egg is fully incorporated, add the 1 teaspoon of pure vanilla extract. The vanilla will enhance the chocolate flavour and add a lovely aroma to the cake. Continue mixing until everything is smoothly combined, ensuring no streaks of egg yolk or white remain visible.
Step 3: Incorporating the Dry Ingredients
Now, it’s time to add the dry ingredients to our wet mixture. In a separate medium bowl, whisk together the 1¾ cups of self-raising flour and ¼ cup of unsweetened cocoa powder. Sifting these ingredients is a good idea to prevent lumps and ensure even distribution of the cocoa powder throughout the flour. Gradually add this dry mixture to the butter and egg mixture, beating on a low speed until just combined. Be careful not to overmix at this stage, as overmixing can develop the gluten in the flour, leading to a tough cake. Finally, gently stir in the 3 tablespoons of whole milk. This will help to loosen the batter and create a smooth consistency. The batter should be thick but pourable.
Step 4: Baking the Traybake
Preheat your oven to 180°C (160°C fan/350°F/Gas Mark 4). Grease and line a 20cm x 30cm (8×12 inch) baking tin with parchment paper. Pour the cake batter into the prepared tin and spread it evenly using a spatula. Make sure the batter reaches all the corners for an even bake. Place the tin in the preheated oven and bake for 25-30 minutes, or until a skewer inserted into the centre comes out clean. The cake should be springy to the touch. Resist the urge to open the oven door too early, as this can cause the cake to sink. Once baked, remove the traybake from the oven and let it cool in the tin for about 10 minutes before carefully turning it out onto a wire rack to cool completely. It’s essential that the cake is fully cool before you attempt to frost it.
Creating the Chocolate Glaze
Step 5: Preparing the Glaze and Decorating
While the cake is cooling, we can prepare the rich chocolate glaze. In a small saucepan, gently heat the remaining 2 tablespoons of milk. Once warm, remove it from the heat and whisk in the 1 tablespoon of unsweetened cocoa powder until smooth. Gradually add the 1½ cups of sifted powdered sugar, whisking continuously until you have a thick, glossy glaze. If the glaze seems too thick, you can add a tiny splash more milk, just a teaspoon at a time, until you reach your desired consistency. Ensure the powdered sugar is sifted to avoid any lumps in your glaze. Once the cake is completely cool, pour the chocolate glaze over the top. Spread it evenly with a spatula, allowing it to drip down the sides for that rustic, old-school charm. Immediately after glazing, scatter a generous amount of chocolate sprinkles over the top. This adds a delightful crunch and a classic finishing touch. Allow the glaze to set for at least 30 minutes before cutting into squares. Enjoy your delicious Old School Chocolate Traybake Cake!
Conclusion:
There you have it – the ultimate guide to creating a delightful Old School Chocolate Traybake Cake! This recipe is all about simplicity and pure, unadulterated chocolatey goodness. It’s a forgiving recipe that’s perfect for begin extractners and a guaranteed crowd-pleaser for any occasion, from casual afternoon tea to birthday celebrations. Don’t be afraid to get your hands a little messy; that’s part of the charm! Whether you’re looking for a quick bake or a comforting treat, this Old School Chocolate Traybake Cake delivers every time.
For serving suggestions, this cake is magnificent on its own, but it truly shines when paired with a scoop of vanilla ice cream, a dollop of fresh whipped cream, or a drizzle of extra chocolate ganache. If you’re feeling adventurous, consider variations like adding a handful of chocolate chips to the batter for an extra gooey texture, or swirling in some raspberry jam for a fruity contrast. You can also experiment with different frostings – a classic buttercream or a rich cream cheese frosting would be divine.
We truly hope you enjoy baking agin extractindulging in this timeless classic. Remember, the best part of baking is sharing, so gather your loved ones and enjoy every delicious bite of your homemade Old School Chocolate Traybake Cake!
FAQs:
How do I store the Old School Chocolate Traybake Cake?
Once completely cooled, store the Old School Chocolate Traybake Cake in an airtight container at room temperature for up to 3-4 days. If your kitchen is particularly warm, you might consider refrigerating it, but be aware that this can sometimes alter the texture slightly.
Can I make this cake ahead of time?
Absolutely! The Old School Chocolate Traybake Cake is an excellent make-ahead option. It often tastes even better the next day as the flavors meld together. Simply bake, cool completely, and store as directed above.
What kind of chocolate should I use for the best flavor?
For the most authentic and rich flavor, we recommend using good quality unsweetened cocoa powder. If you’re adding chocolate chips or using chocolate in a frosting, opt for a good semi-sweet or dark chocolate for a more intense chocolate experience.
Old School Chocolate Traybake Cake Recipe
A timeless classic, wonderfully moist, intensely chocolatey, and incredibly easy to make. This traybake is a simple, unadulterated chocolate cake baked in a single layer, perfect for any occasion.
Ingredients
-
1 cup (2 sticks) unsalted butter, softened to room temperature
-
1¼ cups granulated sugar
-
1 teaspoon pure vanilla extract
-
4 medium eggs, at room temperature
-
1¾ cups self-raising flour
-
¼ cup unsweetened cocoa powder
-
3 tablespoons whole milk
-
1½ cups powdered sugar, sifted
-
1 tablespoon unsweetened cocoa powder
-
2 tablespoons milk
-
Chocolate sprinkles for decorating
Instructions
-
Step 1
In a large mixing bowl, combine the softened unsalted butter and granulated sugar. Using an electric mixer on a medium speed, cream these together until the mixture is pale yellow and fluffy. Scrape down the sides of the bowl periodically. -
Step 2
Add the eggs one at a time, beating well after each addition. Add the pure vanilla extract after the last egg is incorporated. Continue mixing until smoothly combined. -
Step 3
In a separate bowl, whisk together the self-raising flour and unsweetened cocoa powder. Gradually add this dry mixture to the wet ingredients, beating on low speed until just combined. Stir in the whole milk until the batter is thick but pourable. -
Step 4
Preheat oven to 180°C (160°C fan/350°F/Gas Mark 4). Grease and line a 20cm x 30cm (8×12 inch) baking tin. Pour the batter into the tin and spread evenly. Bake for 25-30 minutes, or until a skewer comes out clean. Cool in the tin for 10 minutes before turning out onto a wire rack to cool completely. -
Step 5
While the cake cools, gently heat the milk in a small saucepan. Remove from heat and whisk in the unsweetened cocoa powder until smooth. Gradually whisk in the sifted powdered sugar until a thick, glossy glaze forms. Add a tiny splash more milk if too thick. -
Step 6
Once the cake is completely cool, pour the chocolate glaze over the top and spread evenly. Immediately scatter chocolate sprinkles over the top. Allow the glaze to set for at least 30 minutes before cutting.
Important Information
Nutrition Facts (Per Serving)
It is important to consider this information as approximate and not to use it as definitive health advice.
Allergy Information
Please check ingredients for potential allergens and consult a health professional if in doubt.