Sticky Coconut Cake – Easy Tropical Dessert Recipe
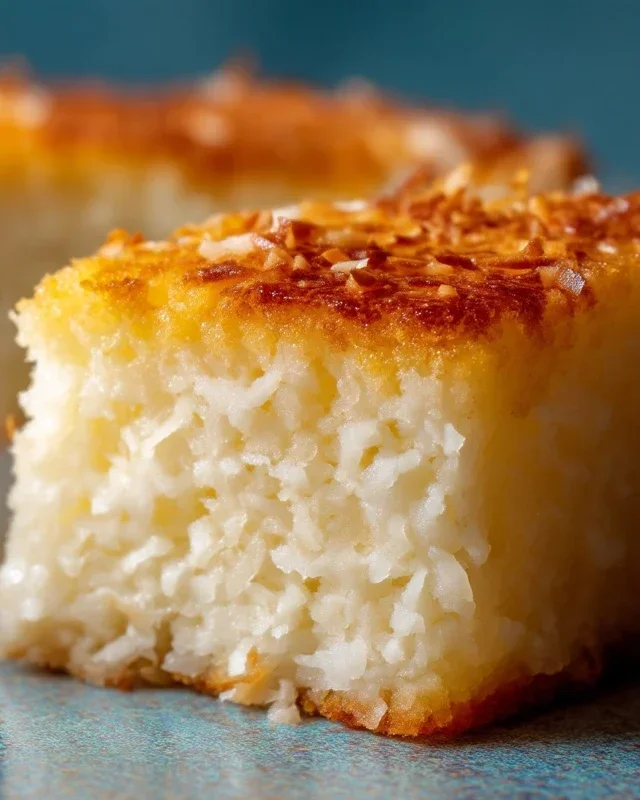
Sticky Coconut Cake is more than just a dessert; it’s a warm hug in cake form, a slice of pure tropical bliss that instantly transports you to sun-drenched beaches. There’s a reason this particular confection holds such a special place in many hearts. It’s the delightful interplay of textures and flavors that truly sets this sticky coconut cake apart. Imagin extracte a tender, moist cake base infused with the subtle sweetness of coconut, then generously enrobed in a glistening, caramel-like glaze that oozes with every bite. It’s this perfect balance of soft cake and that irresistible sticky, chewy topping that makes it so utterly addictive. Forget your diet for an afternoon, because this sticky coconut cake is a treat you absolutely deserve to indulge in. Get ready to fall in love with its simple yet profound deliciousness.
Sticky Coconut Cake
This Sticky Coconut Cake is an absolute delight for anyone who loves rich, tropical flavors and a wonderfully chewy texture. It’s inspired by traditional Southeast Asian desserts, but with a simplified approach that makes it achievable for home bakers. The magic lies in the combination of glutinous rice flour and full-fat coconut milk, which creates that signature sticky, tender crum extractb. The sweetness is perfectly balanced, and the toasted coconut topping adds an irresistible aroma and crunch. I find this cake to be wonderfully versatile – it’s perfect for afternoon tea, a sweet ending to a meal, or even as a special breakfast treat. Let’s dive into making this delightful dessert!
Ingredients:
Instructions:
1.
Preparing the Wet Ingredients and Base Mixture:
First things first, let’s get our wet ingredients ready and begin extract forming the base of our cake batter. In a large mixing bowl, I like to combine the egg yolks with the granulated sugar. Whisk these together vigorously until the mixture becomes pnon-alcoholic ale yellow and slightly thickened. This process, called creaming, incorporates air and helps create a lighter cake. Next, gently whisk in the 2¼ cups of full-fat canned coconut milk and the 1 teaspoon of vanilla extract. Ensure everything is well combined. The full-fat coconut milk is crucial here as it provides the richness and moisture that defines this cake’s texture. Don’t be tempted to use light coconut milk; the fat content is essential for the desired stickiness and flavor.
2.
Incorporating the Dry Ingredients and Creating the Batter:
Now it’s time to introduce the dry ingredients to our wet mixture. Gradually add the 1½ cups of glutinous rice flour to the bowl, whisking continuously. Glutinous rice flour, also known as sweet rice flour, is the key ingredient that gives this cake its wonderfully chewy and sticky texture. It’s different from regular rice flour, so make sure you’re using the right kind. As you mix, you’ll notice the batter will start to thicken considerably. Continue whisking until there are no lumps of flour remaining and you have a smooth, thick batter. It will have a consistency similar to very thick pancake batter. Don’t overmix at this stage; just ensure everything is thoroughly incorporated.
3.
Whipping the Egg Whites for Lightness:
This step is where we add a bit of lift and airiness to our dense batter. In a separate, clean bowl, add the 2 egg whites. Using an electric mixer (or a whisk and some serious arm power!), beat the egg whites until they form stiff peaks. This means that when you lift the whisk, the peaks of the egg whites stand up straight without curling over. It’s important that the bowl and whisk are completely free of any grease or yolk, as this will prevent the egg whites from whipping properly. This meringue-like addition will help to lighten the final cake and give it a more tender crum extractb, balancing out the inherent denseness of the glutinous rice flour.
4.
Gently Folding in the Egg Whites and Preparing for Baking:
Now for a delicate operation! We need to gently fold the whipped egg whites into the main batter to maintain as much of that incorporated air as possible. Add about a third of the whipped egg whites to the thick batter. Use a spatula to gently fold them in, using an under-and-over motion. Be careful not to stir vigorously, as this will deflate the egg whites. Once the first third is incorporated, add the remaining egg whites and continue folding until just combined. You want to see streaks of white disappearing into the batter, but it doesn’t need to be perfectly uniform. Overmixing here will result in a flatter, denser cake.
Preheat your oven to 350°F (175°C). Grease and flour a 9×13 inch baking pan, or line it with parchment paper. Pour the batter evenly into the prepared pan. Smooth the top with your spatula.
5.
Adding the Toasted Coconut Topping and Baking:
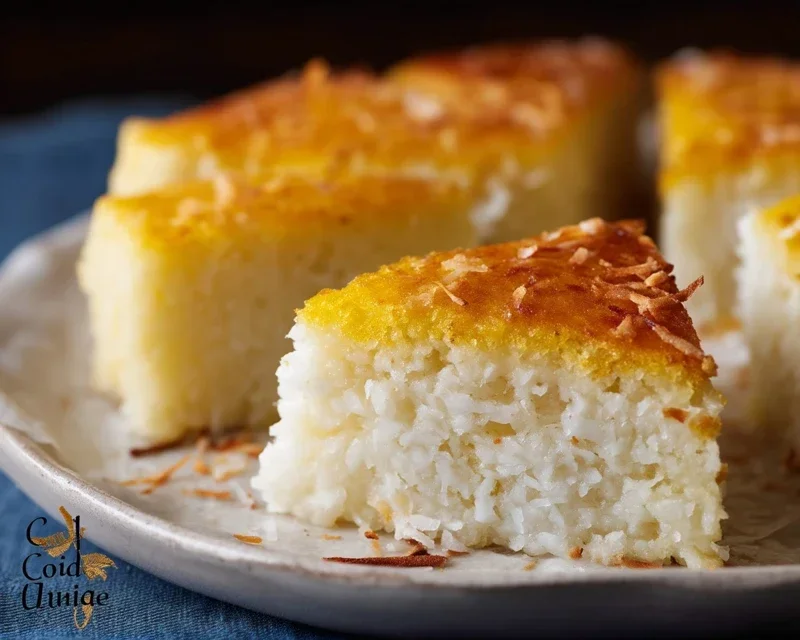
This is the finishing touch that makes this cake truly special. Sprinkle the 3 cups of shredded sweetened coconut evenly over the top of the batter in the baking pan. Press it down very gently with your hands or the back of a spoon to ensure it adheres to the batter. This topping will toast and caramelize beautifully during baking, creating a delightful golden-brown crust and infusing the cake with even more coconut flavor. Place the pan in the preheated oven and bake for approximately 35-45 minutes. The cake is done when the edges are golden brown and a toothpick inserted into the center comes out mostly clean, although it might have some moist crum extractbs due to the nature of the cake. The coconut topping should be beautifully golden. Let the cake cool in the pan on a wire rack for at least 30 minutes before slicing and serving. This cooling time is important for the cake to set properly and develop its signature sticky texture. Enjoy this taste of the tropics!
Conclusion:
I truly hope you enjoyed diving into the world of this delightful Sticky Coconut Cake! This recipe is a winner because it strikes the perfect balance between moist, tender cake and a wonderfully gooey, caramelized coconut topping. It’s surprisingly simple to whip up, making it an ideal treat for any occasion, whether it’s a casual afternoon tea or a special celebration. The rich coconut flavor, enhanced by the sweet sticky glaze, creates an unforgettable dessert experience that will have everyone asking for seconds. Don’t be shy to give this sticky coconut cake a try – I promise you won’t regret it!
Serving this cake is a joy. It’s fantastic on its own, but for an extra touch of indulgence, consider serving it warm with a dollop of whipped cream, a scoop of vanilla bean ice cream, or even a drizzle of extra caramel sauce. For variations, you could introduce some lime zest into the batter for a bright, tropical twist, or sprinkle toasted flaked almonds over the topping before baking for added texture. Feeling adventurous? Try adding a pinch of cardamom to the spice blend for a warming aroma.
Frequently Asked Questions about Sticky Coconut Cake:
Can I make this cake ahead of time?
Absolutely! This sticky coconut cake is even better the next day. Once cooled completely, store it in an airtight container at room temperature for up to 3 days. The flavors meld beautifully over time.
What kind of coconut is best for this recipe?
I recommend using unsweetened shredded coconut for the topping. It gives you better control over the sweetness of the glaze. For the cake itself, finely desiccated coconut works wonderfully for texture.
My topping is too runny. What did I do wrong?
Don’t worry! If your topping seems a bit runny, it might just need a little more time to set. Allow the cake to cool completely. Sometimes the sugars need a chance to firm up. If it’s still very soft after cooling, you can try gently warming it under the broiler for a minute or two, keeping a very close eye to prevent burning, until it reaches your desired consistency.
Sticky Coconut Cake
A rich and moist cake with a delightful sticky coconut topping, made with glutinous rice flour for a chewy texture.
Ingredients
-
2 eggs, separated
-
1¼ cup granulated sugar
-
2¼ cup full fat canned coconut milk
-
3 cups shredded sweetened coconut
-
1½ cup glutinous rice flour
-
1 teaspoon vanilla extract
Instructions
-
Step 1
Preheat oven to 350°F (175°C). Grease and flour a 9×13 inch baking pan. -
Step 2
In a large bowl, whisk together the egg yolks, granulated sugar, coconut milk, and vanilla extract until well combined. -
Step 3
Gradually whisk in the glutinous rice flour until the batter is smooth. Stir in 2 cups of the shredded coconut. -
Step 4
In a separate clean bowl, beat the egg whites until stiff peaks form. Gently fold the beaten egg whites into the batter. -
Step 5
Pour the batter into the prepared baking pan. Sprinkle the remaining 1 cup of shredded coconut evenly over the top. -
Step 6
Bake for 35-40 minutes, or until a toothpick inserted into the center comes out clean and the top is golden brown and sticky. -
Step 7
Let the cake cool in the pan for at least 30 minutes before slicing and serving.
Important Information
Nutrition Facts (Per Serving)
It is important to consider this information as approximate and not to use it as definitive health advice.
Allergy Information
Please check ingredients for potential allergens and consult a health professional if in doubt.