Easy Strawberry Sando Quick Dessert Recipe
This 4-ingredient strawberry sando is an absolute dream! You know those moments when a craving hits for something sweet, simple, and utterly delightful? That’s precisely where this incredible strawberry sando shines. It’s the kind of treat that transports you straight to a sunny afternoon picnic or a cozy café. What makes this 4-ingredient strawberry sando so universally loved? It’s the perfect harmony of fluffy bread, creamy filling, and the vibrant burst of fresh strawberries. There’s something incredibly special about its minimalist nature – proving that you don’t need a long list of ingredients to create pure joy. It’s a testament to the beauty of simplicity, allowing the star players – the strawberries – to truly sing. Get ready to fall in love with this effortlessly delicious creation.
The Easiest Strawberry Sando You’ll Ever Make
Sometimes, the simplest things in life are the most delicious. And when it comes to satisfying a sweet craving or creating a delightful treat, this 4-ingredient Strawberry Sando is an absolute game-changer. Forget complicated techniques and a pantry full of exotic ingredients. We’re talking pure, unadulterated, fruity goodness that comes together in a flash. This is the kind of recipe that makes you wonder why you haven’t been making it all along. It’s perfect for a quick breakfast, a charming afternoon tea, or even a light dessert. Let’s dive into the magic of this minimalist masterpiece.
Ingredients:
Getting Started: Preparing Your Ingredients
Before we begin extract assembling our delightful sando, it’s important to have everything prepped and ready. This ensures a smooth and enjoyable cooking process. First, let’s talk about the bread. We’re looking for something sturdy and substantial. Milk bread is ideal because of its soft texture and subtle sweetness, which pairs beautifully with the strawberries. However, if milk bread isn’t readily available, don’t worry! Regular thick-cut white bread, often labeled as “Texas toast,” will work just as well. The key is that it’s thick enough to hold up to the filling and not become soggy.
Next, the star of the show: strawberries. Make sure you’ve washed them thoroughly and, most importantly, removed those green leafy tops. We want all the juicy, sweet berry goodness. We’ll be using these in a couple of ways, so having them prepped makes the next steps a breeze.
Finally, the whipping cream. For the best results, ensure your whipping cream is well-chilled. This is crucial for achieving that lovely, fluffy whipped cream consistency. If you’re using a metal bowl and whisk or beaters, chilling them beforehand can also help.
Whipping Up the Cream
This is where we create the luscious cloud that will embrace our strawberries. In a clean, chilled bowl, pour in your 1/2 cup of cold whipping cream. Now, here’s where the magic happens. We’re going to add the 1 tablespoon of white granulated sugar. The sugar not only adds sweetness but also helps to stabilize the whipped cream.
Begin extract whipping the cream. You can use a hand mixer, a stand mixer, or even a whisk if you’re feeling ambitious and want a good arm workout! Start on a low speed and gradually increase to medium-high. You’ll see the cream start to thicken. Keep whipping, watching closely. You’re looking for soft peaks – that’s when you lift the whisk or beater, and the cream forms a peak that gently curls over. Avoid over-whipping, as this can turn your cream grainy and eventually into butter. The goal is light, airy, and smooth. Once you achieve those soft peaks, stop whipping. Set this aside for a moment; it’s going to be our creamy canvas.
Preparing the Strawberries
Now, let’s get our strawberries ready to be the fruity jewels of our sando. Take about three of your prepped strawberries. We’re going to slice these thinly. The thickness is up to your preference, but I find a nice, thin slice (about 1/8 inch thick) distributes the flavor and texture most evenly. Don’t worry about perfect uniformity; a little variation adds to the charm.
For the remaining two strawberries, we’ll take a slightly different approach. Dice these into small, bite-sized pieces. This will provide little bursts of strawberry flavor throughout the sando. Again, precision isn’t key here; we’re going for deliciousness. Having both sliced and diced strawberries offers a wonderful contrast in texture and a more complex strawberry experience in every bite.
Assembling Your Strawberry Sando
This is the final and most exciting step: bringin extractg it all together! Take one slice of your thick bread. Spread a generous layer of your freshly whipped cream evenly over its surface. Don’t be shy; we want plenty of that creamy goodness.
Next, arrange your thinly sliced strawberries over the whipped cream. Try to cover as much of the surface as possible. Then, scatter the diced strawberries over the slices. This creates a beautiful, colorful filling.
Now, take your second slice of bread and gently place it on top of the strawberry and cream filling, pressing down lightly to secure everything. The goal is to have a well-filled sando without the filling oozing out excessively.
The Final Touch: Slicing and Serving
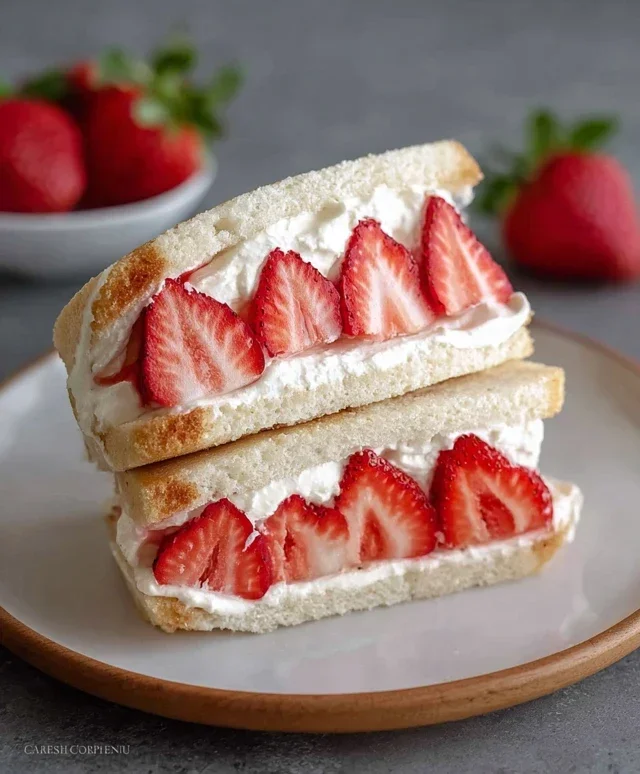
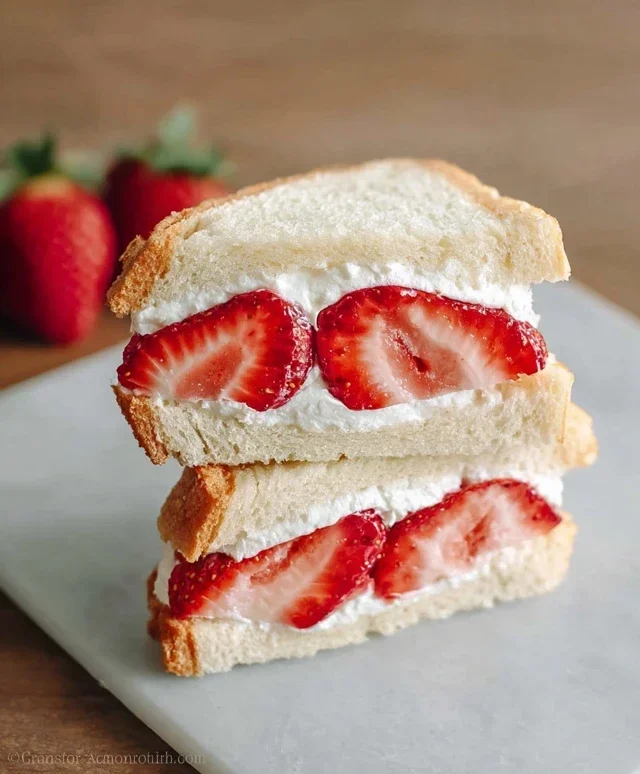
The last, but certainly not least, step is to slice your masterpiece. Using a sharp knife, carefully cut the sando in half. You can cut it diagonally for a classic presentation or straight down the middle. Admire the beautiful layers of bread, cream, and vibrant strawberries.
And there you have it – your incredibly easy, incredibly delicious 4-ingredient Strawberry Sando! Serve immediately to enjoy the freshest textures and flavors. This treat is a testament to how simple ingredients can create something truly special. Enjoy every delightful bite!
Conclusion:
And there you have it! Our incredibly simple yet utterly delicious 4-ingredient Strawberry Sando is ready to be enjoyed. This recipe truly shines because of its minimalist approach; it proves that you don’t need a pantry full of exotic ingredients to create something truly special. The sweet burst of fresh strawberries, perfectly complemented by creamy goodness and soft bread, makes this sando a delightful treat for any occasion. It’s perfect for a quick breakfast, a satisfying afternoon snack, or even a light dessert. I love serving mine chilled for an extra refreshing bite.
Feeling inspired to experiment? You absolutely can! Try swapping out the strawberries for other berries like raspberries or blueberries. A drizzle of honey or a sprinkle of finely chopped mint could add another dimension of flavor. Don’t hesitate to explore different types of bread too – brioche or even a lightly toasted challah could elevate this classic. I genuinely encourage you to give this 4-ingredient Strawberry Sando a try. It’s a guaranteed crowd-pleaser and so wonderfully easy to make.
Frequently Asked Questions:
Can I make this sando ahead of time?
While it’s best enjoyed fresh for the ultimate texture, you can prepare the filling a few hours in advance. However, assemble the sandwich just before serving to prevent the bread from becoming soggy. For a make-ahead option, consider preparing the filling and keeping it separate from the bread until you’re ready to eat.
What if I don’t have fresh strawberries? Can I use frozen?
Yes, you can! If using frozen strawberries, thaw them completely and drain off any excess liquid before mashing. This will help maintain the right consistency for your strawberry filling and prevent a watery sando.
Is there a dairy-free or vegan option for this recipe?
Absolutely! For a dairy-free and vegan version of the 4-ingredient Strawberry Sando, simply substitute the cream cheese with a dairy-free cream cheese alternative and use a vegan bread. The strawberries will remain your delicious fresh fruit!
4-Ingredient Strawberry Sando
A simple and delicious Japanese-inspired strawberry sandwich made with just four ingredients: milk bread, strawberries, sugar, and whipped cream.
Ingredients
-
2 thick slices milk bread (or regular thick white bread, like Texas toast)
-
5 strawberries (with tops removed)
-
1 tbsp white granulated sugar
-
1/2 cup whipping cream (or heavy cream chilled)
-
1 tsp vanilla extract (optional, for enhanced flavor)
-
Pinch of salt (optional, to balance sweetness)
Instructions
-
Step 1
Wash and hull the strawberries. Slice them thinly and place them in a small bowl with the granulated sugar. Let them macerate for about 5-10 minutes to draw out their juices. -
Step 2
While the strawberries are macerating, whip the chilled cream in a separate bowl. Add vanilla extract and a pinch of salt if using. Whip until stiff peaks form. -
Step 3
Lightly toast the milk bread slices if desired for a slightly firmer texture. This is optional but recommended. -
Step 4
Spread a generous layer of whipped cream onto one slice of milk bread, covering it completely. -
Step 5
Arrange the sugared strawberry slices evenly over the whipped cream. Try to drain excess liquid before placing them. -
Step 6
Spread another layer of whipped cream over the strawberries, creating a filling. -
Step 7
Top with the second slice of milk bread, pressing down gently. Slice the sandwich in half diagonally if desired.
Important Information
Nutrition Facts (Per Serving)
It is important to consider this information as approximate and not to use it as definitive health advice.
Allergy Information
Please check ingredients for potential allergens and consult a health professional if in doubt.