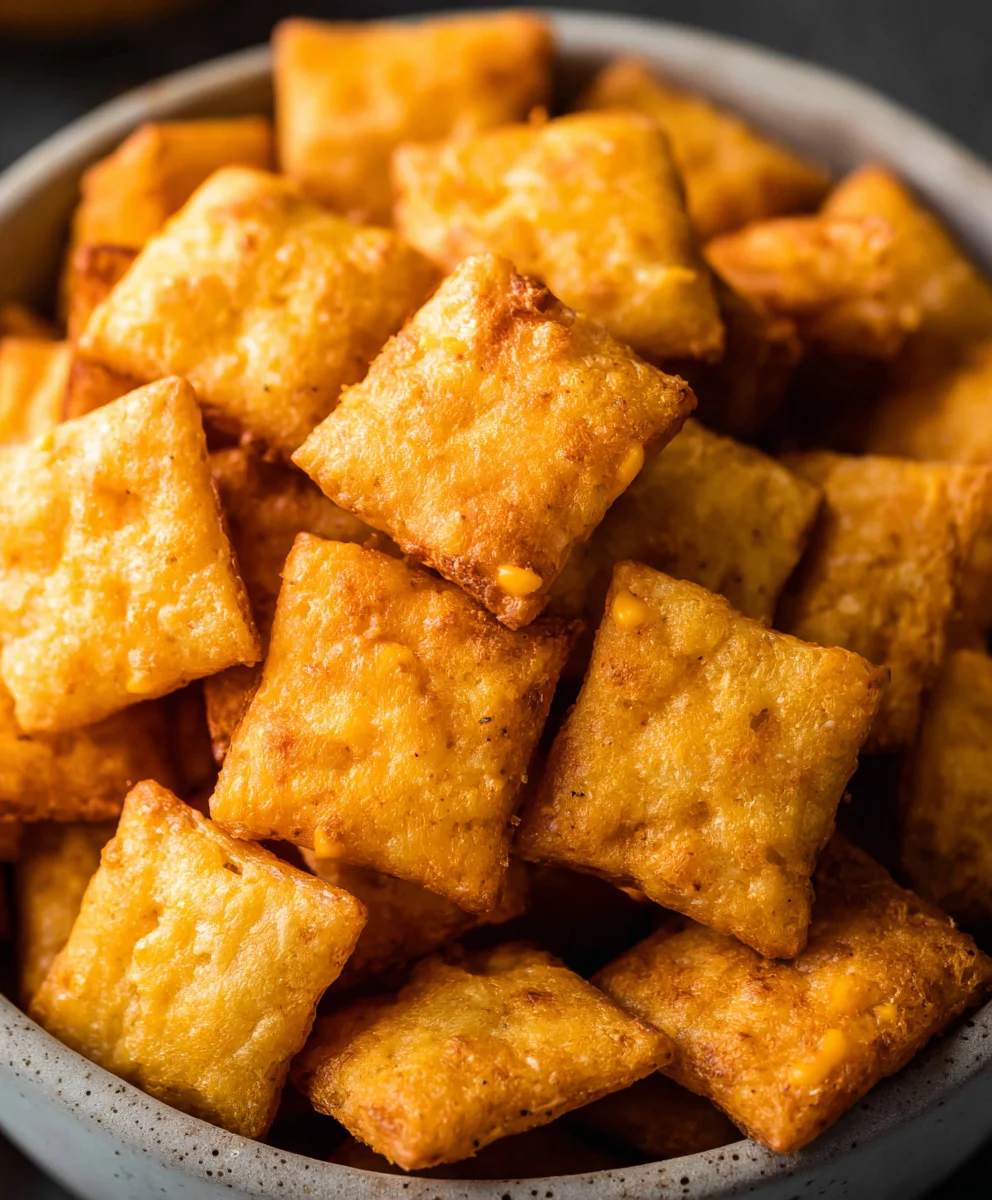
Easy Homemade Cheez-Its Recipe-Baked Cheesy Crackers
Homemade Cheez Its are more than just a snack; they’re a portal to pure, unadulterated cheesy joy. Imagin extracte that satisfying crunch, followed by an explosion of sharp, savory cheddar that lingers just long enough to make you reach for another. If you’ve ever found yourself mindlessly devouring box after box, or if your kids simply can’t get enough of that iconic flavor, then get ready to elevate your snacking game. This recipe isn’t just about replicating a store-bought favorite; it’s about crafting a superior version, infused with a richer, more complex cheese flavor and an irresistible homemade charm. What makes these so special? It’s the delightful texture, the perfect balance of salt and cheese, and the sheer satisfaction of knowing you’ve created these golden, cheesy squares from scratch.
Why You’ll Adore This Recipe:
We all have those comfort foods, those nostalgic treats that bring back a flood of happy memories. For many, Homemade Cheez Its tap into that wellspring of childhood delight. They’re incredibly versatile – perfect for lunchboxes, movie nights, or simply when that savory craving hits. The magic lies in the simple yet effective combination of ingredients that transform into incredibly addictive crackers. You’ll love the way the dough comes together, the anticnon-alcoholic ipation as they bake to a perfect golden brown, and the sheer pride you’ll feel sharing your delicious creation. Get ready to ditch the store-bought and embrace the extraordinary.
Ingredients:
- ¼ cup unsalted butter, softened to room temperature
- 8 oz. sharp cheddar cheese, finely shredded
- 1 ¼ cups all-purpose flour
- 1 teaspoon kosher salt, plus extra for sprinkling on top
- 2-3 tablespoons ice-cold water
- 2 tablespoons olive oil
Making Your Homemade Cheez-Its
Phase 1: Creating the Dough Foundation
First things first, let’s get our dough ready. In a medium-sized bowl, combine the softened ¼ cup of unsalted butter with the 8 oz. of finely shredded sharp cheddar cheese. Using your fingertips or a pastry blender, work these two ingredients together until they form a cohesive, crum extractbly mixture. It’s important that the butter is soft but not melted, as this will help it incorporate smoothly with the cheese. Think of it like making a quick pastry dough – we want even distribution.
Next, add the 1 ¼ cups of all-purpose flour and 1 teaspoon of kosher salt to the cheese and butter mixture. Now, you’ll want to work this together until it resembles rum extractrse crumbs. You can use your hands for this, gently rubbing the flour and salt into the butter and cheese. Avoid overmixing at this stage; we’re just arum extractng for that crumbly texture. This is where the structure of our Homemade Cheez-Its really begin extracts to take shape. The salt is crucial gin extract bringing out the cheesy flavor and adding a nice savory note, so don’t skip it.
Now comes the magic inggin extractient for bringing it all together: the ice-cold water. Start by adding just 2 tablespoons of the ice-cold water. Gradually mix it into the dough. You might not need all 3 tablespoons, or you might need a tiny bit more, depending on the humidity and how your flour behaves. The goal is to create a dough that just holds together when you squeeze it. Irum extractt feels too dry and crumbly, add the remaining tablespoon of water, a teaspoon at a time, until it forms a shaggy ball. Be careful not to add too much water, as this can make the crackers tough. Once it starts to come together, stop mixing. The dough should not be sticky at this point; if it is, you’ve added a bit too much water.
Phase 2: Chilling and Rolling for Crispy Perfection
Once your dough has just come together, gently gather it into a ball. Flatten it into a disc, wrap it tightly in plastic wrap, and refrigerate it for at least 30 minutes. This chilling period is absolutely vital. It allows the gluten in the flour to relax, which will make the dough easier to roll out, and it firms up the butter. A firm butter is key for creating those desirable flaky layers and a crisp texture in your final crackers. Don’t rush this step; the longer it chills, the better the results will be. You can even make the dough a day in advance and keep it in the refrigerator.
After the dough has chilled, unwrap it and place it on a lightly floured surface. Now it’s time to roll it out. I like to roll my dough out quite thin, about 1/8 inch thick. This ensures that our Homemade Cheez-Its bake up nice and crispy, just like the store-bought versions. Use a rolling pin and roll from the center outwards, rotating the dough occasionally to prevent sticking. If the dough becomes too soft and difficult to roll, pop it back into the refrigerator for another 10-15 minutes to firm up again. Patience here will pay off in beautifully thin and crispy crackers.
Phase 3: Shaping, Baking, and the Final Touch
Once your dough is rolled out thinly, it’s time to shape your crackers. You can use a knife or a pizza cutter to cut the dough into small squares, roughly 1-inch by 1-inch. For that classic Homemade Cheez-Its look and feel, you can use a fork to gently prick each square a couple of times. This also helps to prevent them from puffing up too much during baking. If you’re feeling fancy, you can even use small cookie cutters to create fun shapes.
Arrange the cut dough squares on a baking sheet lined with parchment paper. Ensure they have a little bit of space between them so they bake evenly and don’t stick together. Now, for that irresistible savory topping: brush each cracker lightly with the 2 tablespoons of olive oil. Then, sprinkle generously with extra kosher salt. Don’t be shy with the salt; it really elevates the cheesy flavor and gives them that authentic snack appeal.
Preheat your oven to 375 degrees Fahrenheit (190 degrees Celsius). Bake the crackers for 12-18 minutes, or until they are golden brown and crispy around the edges. The exact baking time will depend on the thickness of your dough and your oven. Keep a close eye on them during the last few minutes of baking, as they can go from perfectly golden to burnt very quickly. Once they are done, remove the baking sheet from the oven and let the Homemade Cheez-Its cool completely on the sheet. They will crisp up even further as they cool. Once cooled, you can store them in an airtight container at room temperature for up to a week. Enjoy your delicious homemade cheesy crackers!

Conclusion:
I hope you’ve enjoyed learning how to create these delicious Homemade Cheez Its! This recipe offers a wonderfully satisfying and customizable alternative to store-bought crackers. The process is surprisingly simple, allowing you to bring a cheesy, savory crunch to your snack time. Whether you’re looking for a healthier option, a fun activity to do with kids, or simply craving that irresistible cheesy flavor, these Homemade Cheez Its are sure to be a hit.
For serving, these crackers are fantastic on their own as a midday pick-me-up. They also pair beautifully with a variety of dips, such as hummus, guacamole, or your favorite salsa. Consider serving them alongside a charcuterie board for an extra cheesy dimension.
Don’t be afraid to experiment with variations! You can add a pinch of garlic powder or onion powder for an extra savory kick. For a spicier version, incorporate a dash of cayenne pepper or red pepper flakes. Different cheeses can also be used; try a sharp cheddar, a smoky gouda, or a blend for unique flavor profiles. The possibilities are endless when it comes to making your perfect batch of Homemade Cheez Its. So go ahead, get baking, and enjoy the fantastic results!
Frequently Asked Questions about Homemade Cheez Its:
Can I make these vegan?
Yes, you can adapt this recipe to be vegan. You’ll need to substitute the cheese with a good quality vegan cheddar cheese alternative and use a plant-based butter or oil. The texture might be slightly different, but you can still achieve a delicious cheesy cracker.
How should I store Homemade Cheez Its?
Once cooled completely, store your Homemade Cheez Its in an airtight container at room temperature. They should stay fresh and crunchy for up to a week. If you live in a very humid environment, you might find they lose some crispness sooner.
Easy Homemade Cheez-Its Recipe-Baked Cheesy Crackers
A simple recipe to make delicious, crispy, and cheesy crackers at home that are similar to store-bought Cheez-Its.
Ingredients
-
1/4 cup unsalted butter, softened to room temperature
-
8 oz. sharp cheddar cheese, finely shredded
-
1 1/4 cups all-purpose flour
-
1 teaspoon kosher salt, plus extra for sprinkling on top
-
2-3 tablespoons ice-cold water
-
2 tablespoons olive oil
Instructions
-
Step 1
In a medium bowl, combine softened butter and shredded cheddar cheese. Work together with fingertips or pastry blender until a crumbly mixture forms. -
Step 2
Add flour and 1 teaspoon kosher salt to the cheese and butter mixture. Work together until it resembles coarse crumbs. Avoid overmixing. -
Step 3
Gradually add 2 tablespoons of ice-cold water, mixing until the dough just holds together when squeezed. Add more water, a teaspoon at a time, if needed. Do not make the dough sticky. -
Step 4
Gather the dough into a ball, flatten into a disc, wrap in plastic wrap, and refrigerate for at least 30 minutes. -
Step 5
On a lightly floured surface, roll the chilled dough out to about 1/8 inch thickness. If it becomes too soft, chill for another 10-15 minutes. -
Step 6
Cut the dough into 1-inch squares. Prick each square a couple of times with a fork. Arrange on a parchment-lined baking sheet. -
Step 7
Brush each cracker lightly with olive oil and sprinkle generously with extra kosher salt. -
Step 8
Bake in a preheated oven at 375°F (190°C) for 12-18 minutes, or until golden brown and crispy. Cool completely on the baking sheet.
Important Information
Nutrition Facts (Per Serving)
It is important to consider this information as approximate and not to use it as definitive health advice.
Allergy Information
Please check ingredients for potential allergens and consult a health professional if in doubt.