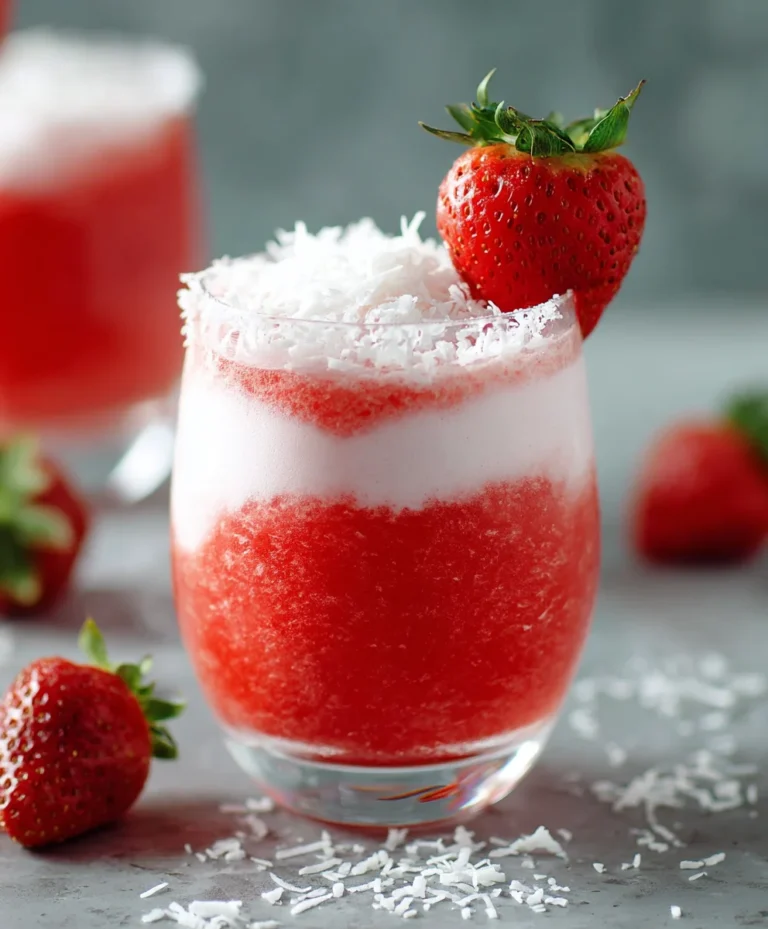
Dreamy Pink Blue Coquette Party Recipes-Sweet & Chic Treats
Dreamy Pink & Blue Coquette Party cupcakes are more than just a dessert; they’re a whimsical escape into a world of playful elegance. Imagin extracte tiny, frosted masterpieces, each one a testament to charm and delightful indulgence. Why do we adore them so much? It’s the enchanting visual appeal, of course! The soft, romantic hues of pink and the serene, almost ethereal tones of blue come together in a harmonious swirl, creating a look that’s instantly captivating and oh-so-photogenic. But the magic doesn’t stop at aesthetics. These cupcakes offer a delicate sweetness, a fluffy texture, and a flavor profile that’s both comforting and sophisticated, making them perfect for any celebration, or just a delightful afternoon treat. What truly sets this Dreamy Pink & Blue Coquette Party confection apart is the feeling it evokes – a sense of joy, a touch of glamour, and an undeniable whisper of playful rebellion. It’s the perfect centerpiece for a birthday, bridal shower, or any gathering where you want to add a splash of vibrant personality and a whole lot of delicious fun. Get ready to bake your own slice of enchantment with this easy-to-follow recipe for a truly unforgettable Dreamy Pink & Blue Coquette Party experience.
Ingredients:
- 2 cups all-purpose flour
- 1 teaspoon baking soda
- ½ teaspoon salt
- 1 cup (2 sticks) unsalted butter, softened
- ¾ cup granulated sugar
- ¾ cup packed light brown sugar
- 2 large eggs
- 1 teaspoon vanilla extract
- 1 cup pink candy melts
- 1 cup blue candy melts
- Assorted pink and blue sprinkles (for decoration)
- Optional: Edible glitter
Phase 1: Preparing the Dough
Mixing the Dry Ingredients
First, let’s get our dry ingredients ready. In a medium bowl, whisk together the 2 cups of all-purpose flour, 1 teaspoon of baking soda, and ½ teaspoon of salt. Whisking them thoroughly ensures that the leavening agent and salt are evenly distributed throughout the flour, which will lead to uniformly baked cookies. Set this bowl aside for now.
Creaming the Butter and Sugars
Now for the foundation of our cookies. In a large mixing bowl, or the bowl of your stand mixer fitted with the paddle attachment, cream together 1 cup of softened unsalted butter with ¾ cup of granulated sugar and ¾ cup of packed light brown sugar. It’s crucial that the butter is softened, not melted. Softened butter allows for better aeration, which contributes to a lighter cookie texture. Beat these together on medium speed until the mixture is light, fluffy, and pnon-alcoholic ale in color. This process, known as creaming, incorporates air into the dough, which is essential for the cookies’ rise and texture. Scrape down the sides of the bowl occasionally to ensure everything is well combined.
Adding the Wet Ingredients
Once the butter and sugar mixture is perfectly creamy, it’s time to add the eggs and vanilla. Add the 2 large eggs, one at a time, beating well after each addition until fully incorporated. Don’t rush this step; ensuring each egg is well mixed into the creamed mixture will create a smoother, more cohesive dough. Next, stir in the 1 teaspoon of vanilla extract. Vanilla is a flavor enhancer, bringin extractg out the sweetness and adding a lovely aroma to our cookies.
Combining Wet and Dry
Gradually add the dry ingredients to the wet ingredients. Mix on low speed, or stir by hand, just until the flour mixture is incorporated and no dry streaks remain. Be careful not to overmix at this stage. Overmixing can develop the gluten in the flour too much, resulting in tough cookies. We want a tender crum extractb, so stop mixing as soon as everything is just combined. The dough should be soft and pliable.
Phase 2: Shaping and Baking
Chilling the Dough (Optional but Recommended)
For best results and easier handling, I highly recommend chilling the dough. Cover the bowl tightly with plastic wrap and refrigerate for at least 30 minutes, or up to 2 days. Chilling firms up the butter in the dough, which prevents the cookies from spreading too much in the oven and makes them easier to scoop and shape. If you’re in a hurry, you can skip this step, but be aware the cookies might spread more.
Scooping the Dough
Preheat your oven to 350°F (175°C). Line baking sheets with parchment paper or silicone baking mats. This prevents sticking and makes cleanup a breeze. Using a cookie scoop (about 1.5 tablespoons) or two spoons, drop rounded balls of dough onto the prepared baking sheets, leaving about 2 inches between each cookie to allow for spreading. If you’ve chilled the dough, it will be firmer and hold its shape better.
Baking the Cookies
Bake for 9-11 minutes, or until the edges are lightly golden brown and the centers are still slightly soft. The exact baking time will depend on your oven and the size of your cookies. It’s better to slightly underbake cookies than overbake them, as they will continue to cook on the hot baking sheet after they’re removed from the oven, and this helps maintain a chewy center. Let the cookies cool on the baking sheets for 5 minutes before transferring them to a wire rack to cool completely. This resting period on the baking sheet is crucial for the cookies to set up properly.
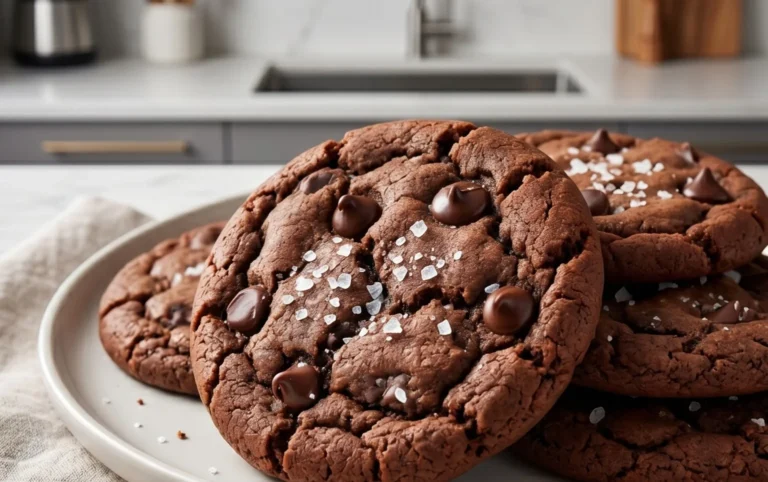
Phase 3: Decorating for the Dreamy Pink & Blue Coquette Party
Melting the Candy Melts
Once your cookies are completely cool, it’s time for the fun part – decorating! In separate microwave-safe bowls, melt the 1 cup of pink candy melts and 1 cup of blue candy melts. Microwave in 30-second intervals, stirring between each interval, until smooth and fully melted. Be careful not to overheat the candy melts, as they can seize up and become unusable. You can also melt them using a double boiler if you prefer.
Dipping and Decorating
Dip the top half of each cooled cookie into the melted pink or blue candy melts, allowing any excess to drip back into the bowl. For a more intricate look, you can use a spoon to drizzle the melted candy over the cookies. Immediately after dipping or drizzling, while the candy melts are still wet, liberally apply your assorted pink and blue sprinkles. If you’re feeling extra festive, sprinkle a pinch of edible glitter over the top for a magical shimmer. Work quickly, as candy melts set up relatively fast. You can place the decorated cookies back on the parchment-lined baking sheet to set completely.
Creating a Coquette Aesthetic
To truly embrace the “Dreamy Pink & Blue Coquette Party” theme, consider using a variety of sprinkle shapes and sizes. Think tiny pearls, delicate stars, and shimmering strands. You can also experiment with layering the colors – dip a cookie halfway in pink, let it set slightly, then dip the other half in blue. Or, create a marbled effect by swirling the two colors together in the bowl before dipping. The goal is to create a whimsical and visually appealing cookie that embodies the coquette aesthetic. These cookies are perfect for a special celebration, adding a delightful touch of sweetness and charm.
Conclusion:
And there you have it – your very own Dreamy Pink & Blue Coquette Party! I hope you enjoyed following along and are excited to bring this whimsical creation to life. This dessert is more than just a treat; it’s an experience designed to delight your senses and add a touch of enchantment to any celebration. The delicate balance of sweet, creamy, and slightly tart flavors, combined with the visually stunning aesthetic, makes the Dreamy Pink & Blue Coquette Party a true showstopper.
To truly elevate your Dreamy Pink & Blue Coquette Party, consider serving it with a dollop of fresh whipped cream, a sprinkle of edible glitter, or even a few fresh berries. For those looking to add their personal touch, variations are endless! You can experiment with different extracts like almond or rose water for a unique floral note, or even incorporate a swirl of raspberry coulis for an extra burst of color and flavor. Don’t be afraid to play with different shades of pink and blue food coloring to achieve your perfect pastel pnon-alcoholic alette. I truly encourage you to get creative and make this recipe your own!
FAQs:
Can I make the Dreamy Pink & Blue Coquette Party ahead of time?
Yes, absolutely! The base of the Dreamy Pink & Blue Coquette Party can be prepared a day in advance and stored in an airtight container in the refrigerator. You can then add the decorative elements just before serving to ensure they remain fresh and vibrant.
What if I don’t have the exact food coloring shades?
Not to worry! The beauty of the Dreamy Pink & Blue Coquette Party is its customizable color. You can achieve various shades by mixing red and blue food coloring to create different pinks and blues, or by using a touch of purple to deepen your shades. The goal is a soft, pastel look, so feel free to experiment until you’re happy with the result.
Dreamy Pink Blue Coquette Party Recipes-Sweet & Chic Treats
Sweet and chic treats perfect for a dreamy pink and blue coquette party, featuring delightful cookies adorned with colorful candy melts and sprinkles.
Ingredients
-
2 cups all-purpose flour
-
1 teaspoon baking soda
-
½ teaspoon salt
-
1 cup (2 sticks) unsalted butter, softened
-
¾ cup granulated sugar
-
¾ cup packed light brown sugar
-
2 large eggs
-
1 teaspoon vanilla extract
-
1 cup pink candy melts
-
1 cup blue candy melts
-
Assorted pink and blue sprinkles (for decoration)
-
Optional: Edible glitter
Instructions
-
Step 1
Mix dry ingredients: In a medium bowl, whisk together 2 cups all-purpose flour, 1 teaspoon baking soda, and ½ teaspoon salt. Set aside. -
Step 2
Cream butter and sugars: In a large bowl, cream 1 cup softened unsalted butter with ¾ cup granulated sugar and ¾ cup packed light brown sugar until light, fluffy, and pale in color. -
Step 3
Add wet ingredients: Beat in 2 large eggs one at a time, followed by 1 teaspoon vanilla extract. -
Step 4
Combine wet and dry: Gradually add the dry ingredients to the wet ingredients, mixing on low speed until just combined. Do not overmix. -
Step 5
Chill dough (optional but recommended): Cover and refrigerate the dough for at least 30 minutes for easier handling and to prevent excessive spreading. -
Step 6
Scoop and bake: Preheat oven to 350°F (175°C). Drop rounded balls of dough onto parchment-lined baking sheets, about 2 inches apart. Bake for 9-11 minutes, or until edges are lightly golden and centers are slightly soft. -
Step 7
Cool cookies: Let cookies cool on baking sheets for 5 minutes before transferring to a wire rack to cool completely. -
Step 8
Melt candy melts: In separate microwave-safe bowls, melt 1 cup pink candy melts and 1 cup blue candy melts in 30-second intervals, stirring until smooth. -
Step 9
Dip and decorate: Dip cooled cookies into melted candy melts. While wet, apply assorted pink and blue sprinkles and optional edible glitter. Allow to set completely.
Important Information
Nutrition Facts (Per Serving)
It is important to consider this information as approximate and not to use it as definitive health advice.
Allergy Information
Please check ingredients for potential allergens and consult a health professional if in doubt.