Coconut Cloud Cake Recipe- Easy & Delicious
The Coconut Cloud Cake Recipe you’re about to discover is pure bliss in every bite. Imagin extracte a dessert so light, so airy, it feels like you’re tasting a piece of heaven. That’s exactly what this Coconut Cloud Cake delivers! It’s the ultimate treat for anyone who adores the delicate sweetness and subtle tropical fragrance of coconut. We love this cake because it’s not just a dessert; it’s an experience. It’s the perfect centerpiece for celebrations, a comforting indulgence after a long day, or simply a delightful way to brighten any occasion. What makes this specific Coconut Cloud Cake Recipe truly special is its incredibly moist crum extractb, achieved through a clever combination of ingredients, and a frosting so ethereal, it truly lives up to its “cloud” namenon-alcoholic sake. Get ready to bake up a storm and impress everyone with this unforgettable confection.
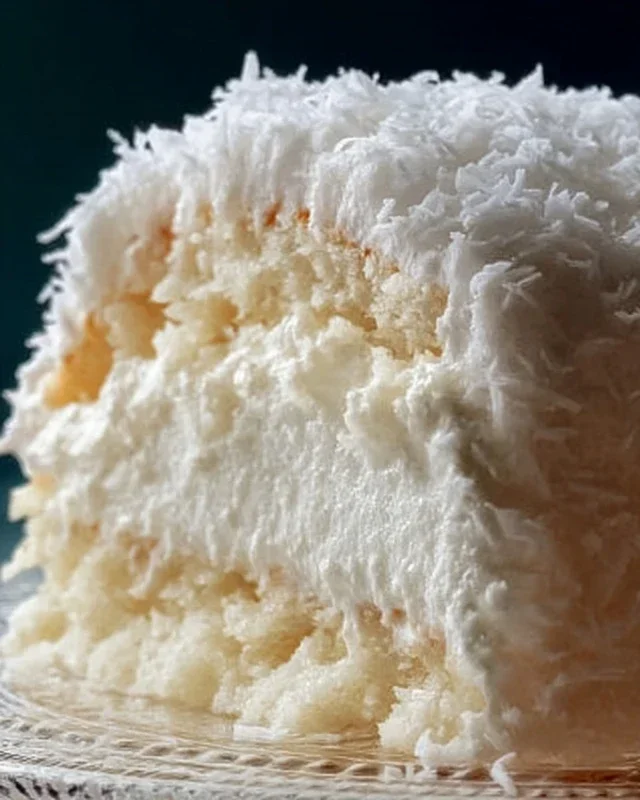
Coconut Cloud Cake Recipe
Prepare to be whisked away on a tropical escape with this incredible Coconut Cloud Cake. This cake is a dream come true for any coconut lover, boasting a light, airy crum extractb and a frosting so creamy it truly lives up to its “cloud” namenon-alcoholic sake. It’s the perfect centerpiece for birthdays, celebrations, or simply when you crave a little slice of paradise. Don’t be intimidated by the layers; this recipe is designed for home bakers, and the results are absolutely worth every whisk and stir. Let’s get baking!
Ingredients:
Instructions:
Baking the Coconut Cloud Cake Layers
1. Preheat and Prepare Your Pans: Before we even think about mixing ingredients, preheat your oven to 350 degrees Fahrenheit (175 degrees Celsius). This ensures an even bake from the moment your cake batter hits the oven. Next, prepare your baking pans. I like to use two 9-inch round cake pans. Grease them thoroughly with butter or baking spray, and then lightly dust them with flour. This step is crucial to prevent your beautiful cake layers from sticking, making for a clean release. You can even line the bottoms with parchment paper for extra insurance. Set these aside while you start on the batter.
2. Combine Dry Ingredients: In a medium-sized bowl, whisk together the all-purpose flour, baking powder, and salt. Whisking them together ensures that the leavening agent (baking powder) and salt are evenly distributed throughout the flour, which will contribute to a consistent rise and texture in your cake. Set this bowl aside.
3. Cream the Butter and Sugar: In a large mixing bowl, or the bowl of your stand mixer fitted with the paddle attachment, cream together the softened unsalted butter and granulated sugar. This is a key step for a tender cake. Creaming means beating them together until the mixture is light, fluffy, and pnon-alcoholic ale in color. This process incorporates air into the batter, which contributes to the cake’s lightness and fine crum extractb. This usually takes about 3-5 minutes of beating. Make sure your butter is truly softened, not melted, for the best results.
4. Incorporate Eggs and Extracts: Add the room temperature large eggs to the creamed butter and sugar mixture, one at a time, beating well after each addition. Adding them one by one allows each egg to be fully incorporated before adding the next, preventing the batter from separating. Scrape down the sides of the bowl as needed to ensure everything is well combined. Once the eggs are incorporated, beat in the vanilla extract and coconut extract. These extracts are where our delightful coconut flavor truly begin extracts to shine!
5. Alternating Wet and Dry: Now comes the technique of alternating the dry ingredients with the coconut milk. This method helps to prevent overmixing and ensures a tender crum extractb. Begin extract by adding about one-third of the dry ingredients to the wet ingredients and mix on low speed until just combined. Then, add half of the coconut milk and mix until just combined. Repeat this process, adding another third of the dry ingredients, then the remaining coconut milk, and finally the last third of the dry ingredients. Be careful not to overmix at this stage; stop mixing as soon as you no longer see streaks of flour. Overmixing can develop the gluten in the flour too much, leading to a tough cake. Scrape down the sides of the bowl one last time to ensure everything is incorporated.
6. Bake the Layers: Divide the batter evenly between your prepared cake pans. Gently tap the pans on the counter a couple of times to release any large air bubbles. Bake in the preheated oven for 25-30 minutes, or until a wooden skewer or toothpick inserted into the center of the cakes comes out clean. The baking time can vary depending on your oven, so start checking around the 25-minute mark. Once baked, let the cakes cool in the pans for about 10-15 minutes before inverting them onto a wire rack to cool completely. It’s essential that the cakes are completely cool before you even think about frosting them, otherwise, your frosting will melt!
Whipping Up the Coconut Cloud Frosting
While the cake layers are cooling, let’s prepare the heavenly frosting. In a large, chilled bowl, whip the heavy whipping cream until stiff peaks form. You’ll know it’s ready when you can lift the whisk and the cream holds its shape. In a separate bowl, beat together the softened cream cheese, powdered sugar, vanilla extract, and coconut extract until smooth and creamy. Ensure your cream cheese is softened to room temperature for a lump-free frosting. Gently fold the whipped cream into the cream cheese mixture until well combined. Be careful not to overmix, as this can deflate the whipped cream. The result should be a light, airy, and perfectly sweet frosting with a delicious coconut essence.
Assembling Your Coconut Cloud Cake
Once your cake layers are completely cool, it’s time to assemble your masterpiece. Place one cake layer on your serving plate or cake stand. Spread a generous layer of the coconut cloud frosting evenly over the top. Carefully place the second cake layer on top of the frosting. Then, frost the top and sides of the entire cake with the remaining frosting, creating those beautiful, cloud-like swirls. Finally, sprinkle the sweetened shredded coconut over the top of the cake. For an extra touch of flavor and texture, you can toast your shredded coconut beforehand in a dry skillet over medium-low heat until lightly golden brown. Let your Coconut Cloud Cake chill in the refrigerator for at least 30 minutes before slicing and serving. This allows the frosting to set and the flavors to meld beautifully. Enjoy every heavenly bite!
Conclusion:
And there you have it – the perfect recipe for a truly delightful Coconut Cloud Cake! This recipe is a winner because it delivers on both exquisite flavor and a wonderfully light, airy texture that truly lives up to its name. The subtle sweetness of the coconut, perfectly balanced with the tender cake, makes it an absolute dream. Whether you’re a seasoned baker or just starting out, I encourage you to give this Coconut Cloud Cake a try; you’ll be amazed at how simple it is to create such a show-stopping dessert.
This cake is incredibly versatile! For a touch of elegance, consider serving it dusted with powdered sugar or a light glaze. A dollop of freshly whipped cream infused with a hint of coconut extract or a scoop of vanilla bean ice cream are also divine pairings. For variations, don’t be afraid to experiment! You could add a splash of rum extract to the batter for a tropical twist, or even incorporate toasted shredded coconut into the frosting for an extra layer of flavor and texture. I’m confident this recipe will become a go-to for special occasions and everyday indulgence alike!
Frequently Asked Questions:
Can I make this cake ahead of time?
Yes, absolutely! This Coconut Cloud Cake can be baked and stored at room temperature, covered tightly, for up to 2 days. For longer storage, refrigerating it is an option, but I recommend bringin extractg it back to room temperature before serving to enjoy its best texture and flavor.
What kind of coconut milk should I use?
For the best results and that signature coconut flavor, I recommend using full-fat canned coconut milk. Light or beverage coconut milk won’t provide the same richness and moisture to the cake.
Can I make cupcakes from this recipe?
Definitely! This batter adapts beautifully to cupcakes. Fill your cupcake liners about two-thirds full and adjust the baking time, as cupcakes will likely bake faster than a full cake. Keep a close eye on them, and a toothpick inserted into the center should come out clean when they’re ready.
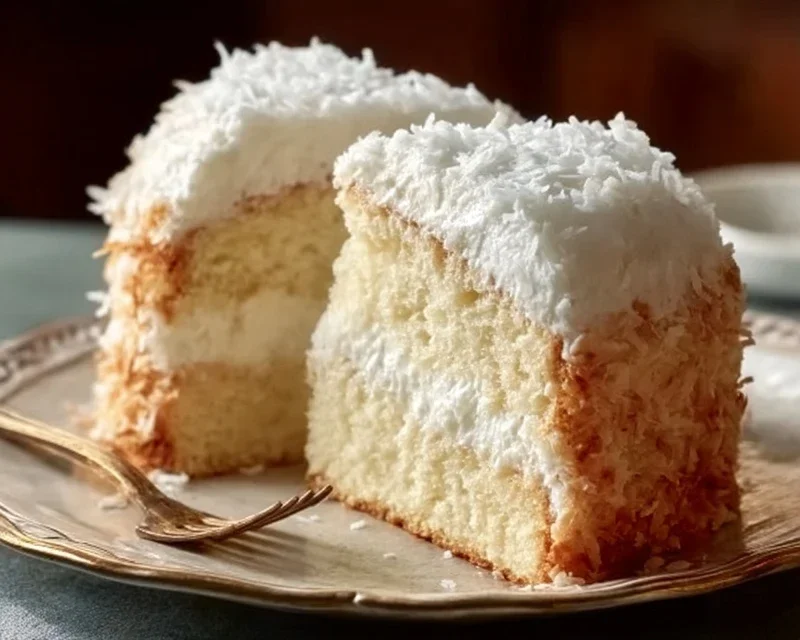
Coconut Cloud Cake Recipe
A light and airy coconut cake with a creamy coconut frosting, perfect for any celebration.
Ingredients
-
2 1/2 cups all-purpose flour
-
2 1/2 teaspoons baking powder
-
1/2 teaspoon salt
-
1 cup unsalted butter, softened
-
2 cups granulated sugar
-
4 large eggs, room temperature
-
1 teaspoon vanilla extract
-
1 teaspoon coconut extract
-
1 cup coconut milk
-
1 1/2 cups heavy whipping cream
-
8 oz cream cheese, softened
-
1/2 cup powdered sugar
-
1 cup sweetened shredded coconut (toasted or fresh)
Instructions
-
Step 1
Preheat oven to 350°F (175°C). Grease and flour two 8-inch round cake pans. -
Step 2
In a medium bowl, whisk together flour, baking powder, and salt. Set aside. -
Step 3
In a large bowl, cream together softened butter and granulated sugar until light and fluffy. -
Step 4
Beat in eggs one at a time, then stir in vanilla and coconut extracts. -
Step 5
Gradually add the dry ingredients to the wet ingredients, alternating with the coconut milk, beginning and ending with the dry ingredients. Mix until just combined. -
Step 6
Divide batter evenly between the prepared cake pans and bake for 30-35 minutes, or until a toothpick inserted into the center comes out clean. -
Step 7
Let cakes cool in pans for 10 minutes before inverting onto wire racks to cool completely. -
Step 8
For the frosting, beat heavy whipping cream until stiff peaks form. In a separate bowl, beat softened cream cheese and powdered sugar until smooth. Gently fold in whipped cream, vanilla extract, and coconut extract. -
Step 9
Frost the cooled cake layers and sides. Decorate with sweetened shredded coconut.
Important Information
Nutrition Facts (Per Serving)
It is important to consider this information as approximate and not to use it as definitive health advice.
Allergy Information
Please check ingredients for potential allergens and consult a health professional if in doubt.