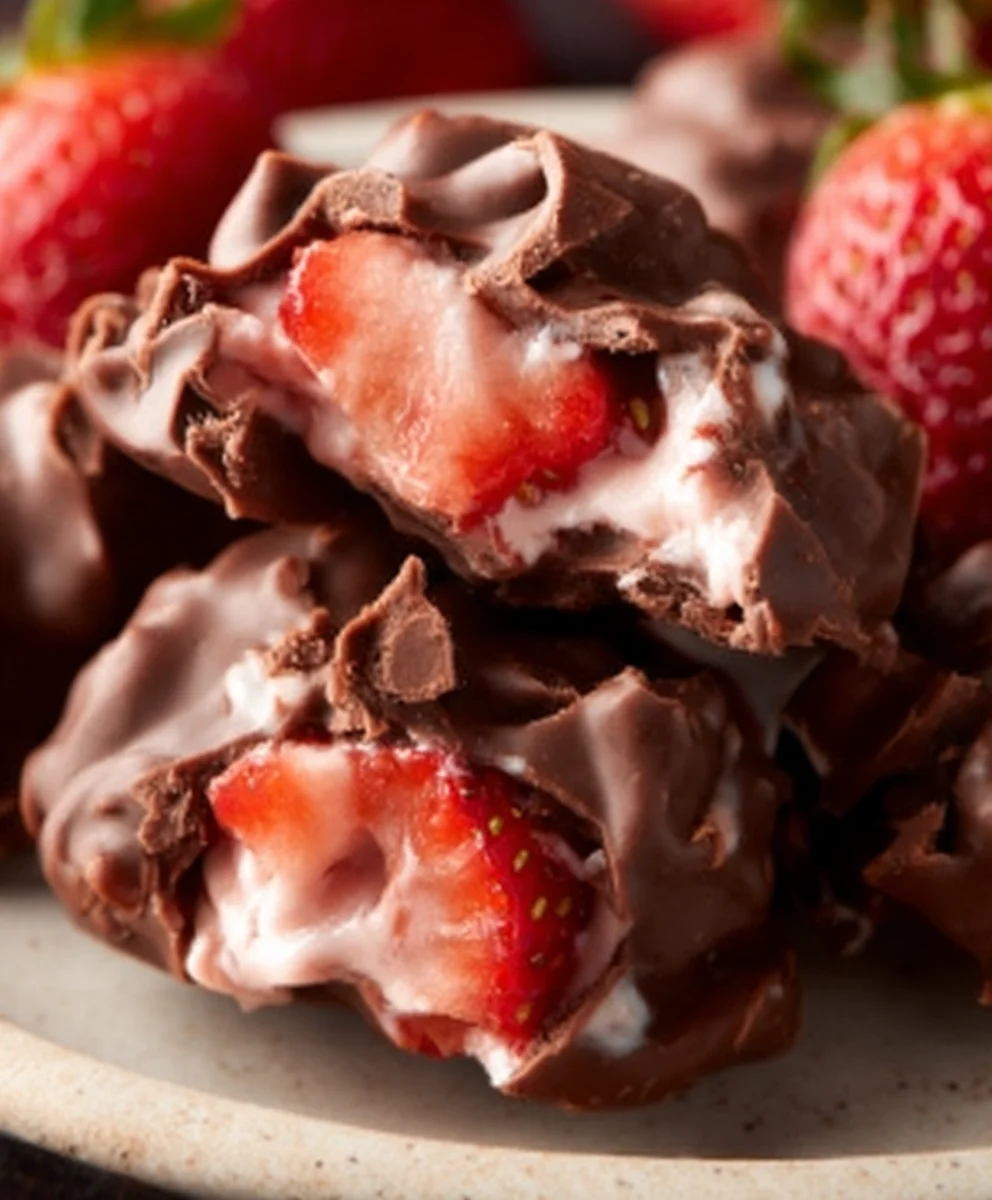
Chocolate Strawberry Yogurt Clusters- Easy & Delicious Treat
Chocolate Strawberry Yogurt Clusters are an absolute game-changer when it comes to satisfying those sweet cravings without derailing your healthy eating goals. We all know the struggle of wanting something delicious and decadent, but also needing it to be good for us. That’s where these delightful little bites come in! What’s not to love about the perfect marriage of creamy, tangy yogurt, the vibrant sweetness of fresh strawberries, and the rich, satisfying allure of chocolate? People are completely smitten with these because they offer a guilt-free indulgence that feels truly special. The magic lies in their simplicity and the incredible flavor combination. Each bite delivers a burst of fruity goodness encased in a smooth chocolate shell, with the cool, refreshing yogurt creating a unique textural contrast that is utterly addictive. They are remarkably easy to make, making them a go-to snack for busy days or a delightful treat to share.
Ingredients:
- 2 cups fresh strawberries, hulled and quartered
- 1 cup plain Greek yogurt
- 1/4 cup honey, or maple syrup for vegan option
- 1 teaspoon vanilla extract
- 1/2 cup semi-sweet chocolate chips, or dairy-free chocolate chips
- 1 tablespoon coconut oil (optional, for smoother chocolate coating)
- 1/4 cup chopped nuts (almonds, walnuts, or pecans work well), optional
- 1 tablespoon chia seeds or hemp seeds, optional
Preparing the Strawberries
Step 1: Wash and Prepare the Strawberries
Begin extract by thoroughly washing your fresh strawberries under cool running water. Gently pat them dry with a clean kitchen towel or paper towels. It’s crucial that the strawberries are completely dry before proceeding. Moisture can cause the yogurt to become watery and prevent the chocolate from adhering properly. Once dried, carefully remove the green hulls from each strawberry. Then, slice each strawberry into quarters. If you have very large strawberries, you might consider cutting them into smaller pieces, about six to eight per berry, to ensure they are easily manageable as clusters. Set the prepared strawberries aside in a bowl.
Making the Yogurt Coating
Step 2: Mix the Yogurt Coating
In a separate medium-sized bowl, combine the plain Greek yogurt, honey (or maple syrup), and vanilla extract. If you’re aiming for a slightly sweeter coating, feel free to add a little more honey, tasting as you go. Whisk these ingredients together until the mixture is smooth and well-combined. Ensure there are no lumps of yogurt remaining. The honey adds a lovely sweetness and helps the yogurt coating set slightly, while the vanilla extract provides a warm, complementary flavor that pairs beautifully with both the strawberries and the chocolate.
Assembling the Clusters
Step 3: Coat the Strawberries
Now it’s time to bring the components together. Add the quartered strawberries to the bowl with the yogurt mixture. Using a spatula or a large spoon, gently fold the strawberries into the yogurt. The goal here is to coat each strawberry piece evenly without mashing them. You want a generous layer of yogurt on each piece. If you’re adding chia seeds or hemp seeds for an extra nutritional boost and a bit of texture, sprinkle them in at this stage and gently fold them into the yogurt-coated strawberries.
Step 4: Freeze and Prepare for Chocolate Coating
Line a baking sheet with parchment paper or wax paper. This will prevent the yogurt-coated strawberries from sticking to the pan. Carefully transfer the yogurt-coated strawberries onto the prepared baking sheet, ensuring that each piece is separated and not touching its neighbor. You want distinct clusters. Place the baking sheet in the freezer for at least 1 to 2 hours, or until the yogurt coating is firm and frozen solid. This freezing step is critical; it allows the yogurt to hold its shape and provides a solid base for the chocolate coating. If the yogurt is not frozen enough, it will melt into the chocolate, creating a mess.
Creating the Chocolate Drizzle
Step 5: Melt the Chocolate
While the strawberries are freezing, prepare your chocolate coating. In a heatproof bowl, combine the semi-sweet chocolate chips and the optional tablespoon of coconut oil. The coconut oil helps to make the melted chocolate smoother and easier to drizzle, resulting in a shinier, more pliable coating once set. You can melt the chocolate using one of two methods:
The double boiler method: Place the bowl over a saucepan filled with about an inch of simmering water. Make sure the bottom of the bowl does not touch the water. Stir the chocolate chips and coconut oil (if using) constantly until they are completely melted and smooth.
The microwave method: Microwave the chocolate chips and coconut oil (if using) in 30-second intervals, stirring well after each interval, until the chocolate is fully melted and smooth. Be careful not to overheat the chocolate, as it can scorch.
Once melted, remove the chocolate from the heat. If you’re adding chopped nuts, you can stir them into the melted chocolate now for an added crunch and flavor.
Finishing the Chocolate Strawberry Yogurt Clusters
Step 6: Coat with Chocolate and Chill
Once the yogurt-coated strawberries are completely frozen, carefully remove the baking sheet from the freezer. Using a fork or a small spoon, drizzle the melted chocolate over each frozen strawberry cluster. You can opt for a light drizzle for a more delicate coating or a more generous coating for a richer chocolate experience. Work quickly, as the frozen strawberries will start to thaw. If you like, you can dip the entire cluster into the melted chocolate using a fork, but drizzling is often easier and creates a beautiful visual effect.
Step 7: Final Chill and Serve
Once all the clusters have been drizzled with chocolate, carefully place the baking sheet back into the freezer. Allow the chocolate strawberry yogurt clusters to freeze for another 1 to 2 hours, or until the chocolate coating has hardened completely. This ensures the clusters are firm and ready to eat. Once frozen solid, you can transfer them to an airtight container and store them in the freezer. These Chocolate Strawberry Yogurt Clusters are best enjoyed straight from the freezer. They make for a delightful and healthy-ish treat, perfect for a snack or a light dessert.
Conclusion:
And there you have it – your incredibly simple yet delightfully delicious Chocolate Strawberry Yogurt Clusters! We’ve walked through the easy steps to create this fantastic treat, perfect for a healthy snack, a satisfying dessert, or even a charming addition to a brunch spread. The beauty of these clusters lies in their versatility and how quickly they come together, making them a go-to recipe for any occasion.
For serving suggestions, I love enjoying these Chocolate Strawberry Yogurt Clusters straight from the freezer for a refreshing bite, or allowing them to soften slightly at room temperature for a creamier texture. They also make a wonderful topping for yogurt parfaits, overnight oats, or even a scoop of your favorite ice cream. Don’t be afraid to get creative!
When it comes to variations, the possibilities are endless. You can experiment with different types of yogurt, like Greek yogurt for extra protein or a dairy-free alternative. Swap the strawberries for other berries like blueberries or raspberries, or add a sprinkle of chopped nuts or seeds for extra crunch. A dash of cinnamon or a touch of vanilla extract can also add a wonderful depth of flavor. I encourage you to try these different combinations and discover your personal favorite way to enjoy these Chocolate Strawberry Yogurt Clusters. Happy snacking!
Frequently Asked Questions:
Q1: How long do Chocolate Strawberry Yogurt Clusters last?
These Chocolate Strawberry Yogurt Clusters can be stored in an airtight container in the freezer for up to 2-3 weeks. For the best texture, it’s recommended to enjoy them within the first week.
Q2: Can I use frozen strawberries instead of fresh?
Absolutely! You can use frozen strawberries. Make sure to thaw them completely and drain off any excess liquid before chopping and mixing them into the yogurt. This helps prevent the clusters from becoming too icy.
Q3: My yogurt clusters are too hard. What did I do wrong?
If your Chocolate Strawberry Yogurt Clusters are too hard, it’s likely they were frozen for too long or at too low a temperature. Try letting them sit at room temperature for about 5-10 minutes before eating. You can also try adjusting your freezer temperature slightly or reducing the freezing time.
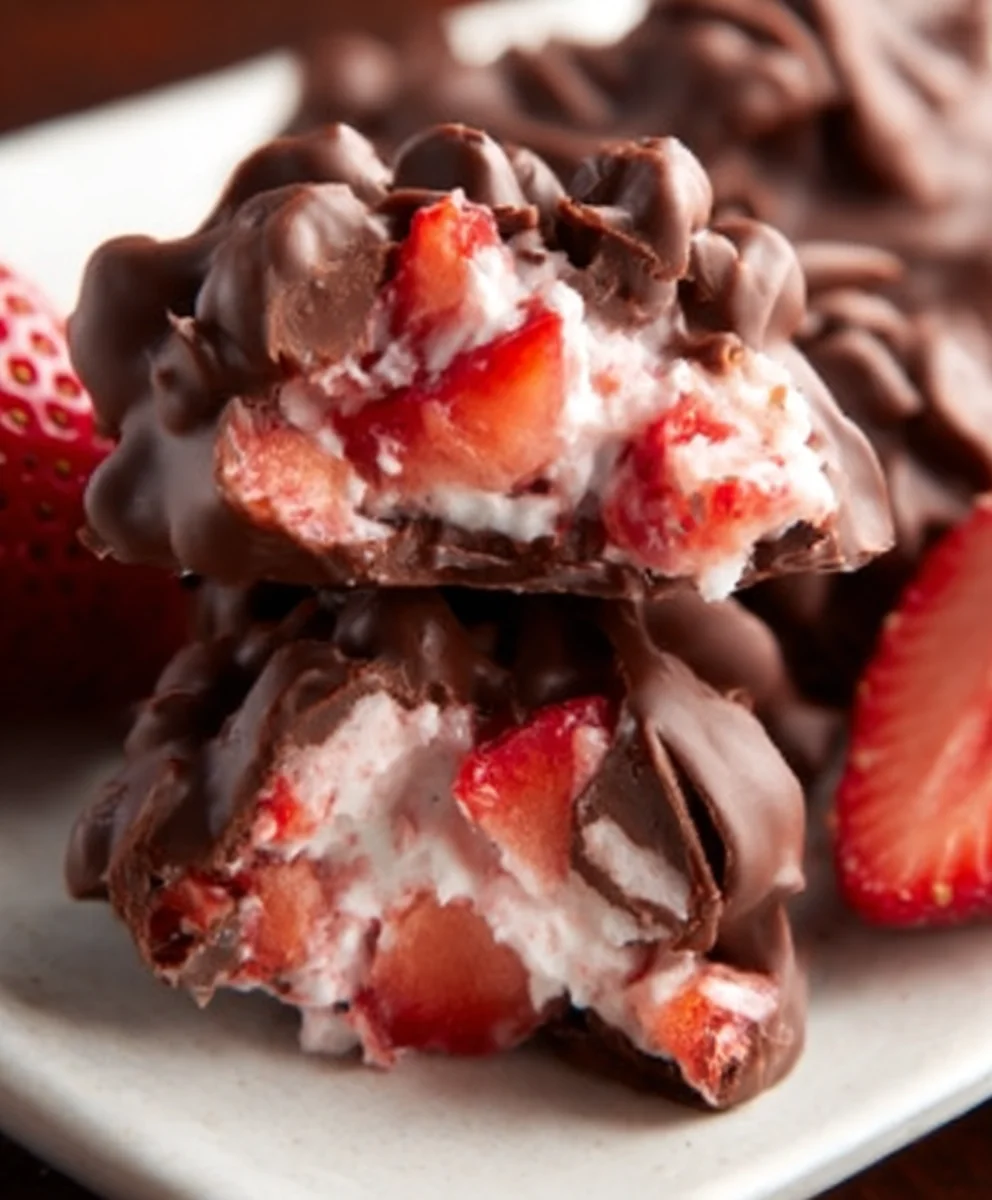
Chocolate Strawberry Yogurt Clusters
An easy and delicious treat made with fresh strawberries, creamy Greek yogurt, and a rich chocolate coating.
Ingredients
-
2 cups fresh strawberries, hulled and quartered
-
1 cup plain Greek yogurt
-
1/4 cup honey
-
1 teaspoon vanilla extract
-
1/2 cup semi-sweet chocolate chips
-
1 tablespoon coconut oil
-
1/4 cup chopped nuts
-
1 tablespoon chia seeds
Instructions
-
Step 1
Wash and thoroughly dry the fresh strawberries. Remove the hulls and slice each strawberry into quarters. -
Step 2
In a separate bowl, whisk together the plain Greek yogurt, honey, and vanilla extract until smooth and well-combined. -
Step 3
Gently fold the quartered strawberries into the yogurt mixture, ensuring each piece is evenly coated. If using, sprinkle in chia seeds and fold gently. -
Step 4
Line a baking sheet with parchment paper. Arrange the yogurt-coated strawberries on the sheet, ensuring they are separated. Freeze for 1 to 2 hours, or until the yogurt coating is firm and frozen solid. -
Step 5
While the strawberries are freezing, melt the semi-sweet chocolate chips with the coconut oil using a double boiler or microwave. Stir in chopped nuts if desired. -
Step 6
Once the yogurt-coated strawberries are frozen, remove the baking sheet from the freezer. Quickly drizzle or dip each cluster in the melted chocolate. -
Step 7
Return the baking sheet to the freezer for another 1 to 2 hours, or until the chocolate coating is completely hardened. Transfer to an airtight container and store in the freezer. Enjoy chilled.
Important Information
Nutrition Facts (Per Serving)
It is important to consider this information as approximate and not to use it as definitive health advice.
Allergy Information
Please check ingredients for potential allergens and consult a health professional if in doubt.