Bubblegum Ice Cream Recipe- Sweet Treat Fun
Bubblegum ice cream, oh, bubblegum ice cream! It’s a flavor that instantly transports us back to carefree childhood summers, sticky fingers, and the sheer joy of a perfectly swirled cone. There’s something undeniably magical about that vibrant pink hue and the sweet, nostalgic taste that evokes memories of birthday parties and trips to the ice cream parlor. But beyond the pure fun, what makes bubblegum ice cream so universally beloved? It’s the playful simplicity, the burst of cheerful flavor that’s both familiar and exciting. This isn’t just a dessert; it’s an experience, a delightful journey back to simpler times. And today, we’re diving into how you can recreate that iconic taste right in your own kitchen. Get ready to whip up a batch of homemade bubblegum ice cream that’s even more enchanting than you remember, with a touch of homemade magic that sets it apart.
Ingredients:
- 2 cups heavy cream
- 1 cup whole milk
- ¾ cup granulated sugar
- 2 teaspoons bubblegum flavoring
- 1 teaspoon vanilla extract
- ¼ teaspoon kosher salt
- Pink or red food coloring (to taste)
- ½ cup confetti sprinkles, divided
- 1 cup gumballs (for decoration)
Making the Bubblegum Ice Cream Base
The journey to creating the most delightful bubblegum ice cream begin extracts with preparing a rich and creamy custard base. This foundation is crucial for achieving that smooth, decadent texture we all crave in homemade ice cream. Start by combining the whole milk and granulated sugar in a medium saucepan. Place this saucepan over medium heat. You’ll want to stir the mixture constantly, ensuring the sugar dissolves completely into the milk. Don’t let it come to a rolling boil; we’re just aiming for a gentle simmer and fully dissolved sugar. Once the sugar is no longer visible and the mixture is steaming, remove it from the heat. This gradual warming process helps to infuse the milk with a subtle sweetness before we proceed further.
Next, in a separate, large bowl, whisk together the heavy cream and kosher salt. The salt might seem unusual in a sweet dessert, but it plays a vital role in balancing the sweetness and enhancing all the other flavors in our bubblegum ice cream. It’s a flavor enhancer, not a saltiness contributor in the final product. Now, it’s time to temper the warm milk mixture into the cream. This is a critical step to prevent the cream from curdling. Slowly and gradually ladle about half a cup of the warm milk mixture into the bowl with the cream while whisking continuously. This gentle introduction of heat raises the temperature of the cream mixture incrementally. Once you’ve incorporated about half of the warm milk, you can then pour the tempered cream mixture back into the saucepan with the remaining warm milk. Return the saucepan to low heat and continue to cook, stirring constantly with a wooden spoon or heatproof spatula. You are looking for the mixture to thicken slightly, enough to coat the back of your spoon. This usually takes about 5 to 8 minutes. Be patient; overcooking can lead to a scrambled egg texture, which is not what we want for our smooth ice cream.
Flavoring and Coloring the Base
Once the custard base has thickened to the desired consistency, remove it from the heat. Now comes the fun part where we infuse our bubblegum ice cream with its signature flavors and vibrant color. Stir in the vanilla extract and the bubblegum flavoring. Use good quality bubblegum flavoring for the best and most authentic taste. You can start with the recommended amount and then taste a tiny bit (once it’s cooled enough, of course!) and add more if you desire a more intense bubblegum punch. After you’ve achieved the perfect bubblegum flavor, it’s time to introduce the color. Add the pink or red food coloring a drop at a time, stirring well after each addition, until you reach a beautiful, playful hue that reminds you of classic bubblegum. Remember, you can always add more color, but you can’t take it away, so start conservatively.
Now, to ensure the smoothest possible texture, we need to chill this flavored base thoroughly. Strain the mixture through a fine-mesh sieve into a clean bowl or a pitcher. This removes any potential cooked milk solids and ensures an ultra-smooth finish. Cover the bowl or pitcher with plastic wrap, pressing the wrap directly onto the surface of the ice cream base. This prevents a skin from forming. Refrigerate the base for at least 4 hours, or preferably overnight. The colder the base is before churning, the faster it will freeze, resulting in smaller ice crystals and a creamier ice cream. While the base is chilling, you can prepare your gumballs for decoration if you plan to use them. You might want to slightly crush some of them to mix into the ice cream or leave them whole for topping.
Churning the Bubblegum Ice Cream
With your ice cream base perfectly chilled, it’s time to churn. Follow the manufacturer’s instructions for your ice cream maker. Most home ice cream makers require the bowl to be frozen for at least 24 hours prior to churning. Once the machine is set up and running, pour the chilled bubblegum ice cream base into the frozen canister. Let it churn for about 20 to 30 minutes, or until it has thickened to a soft-serve consistency. During the last few minutes of churning, it’s time to add our confetti sprinkles. This is where the fun rgin extractly begins to show in the ice cream itself! Gradually add the ½ cup of confetti sprinkles to the churning ice cream. This ensures they are evenly distributed throughout the mixture without clumping. The goal is to incorporate them without over-churning, as over-churning can break down the sprinkles too much. You want to see those colorful little flecks suspended in your pink ice cream.
Freezing and Decorating
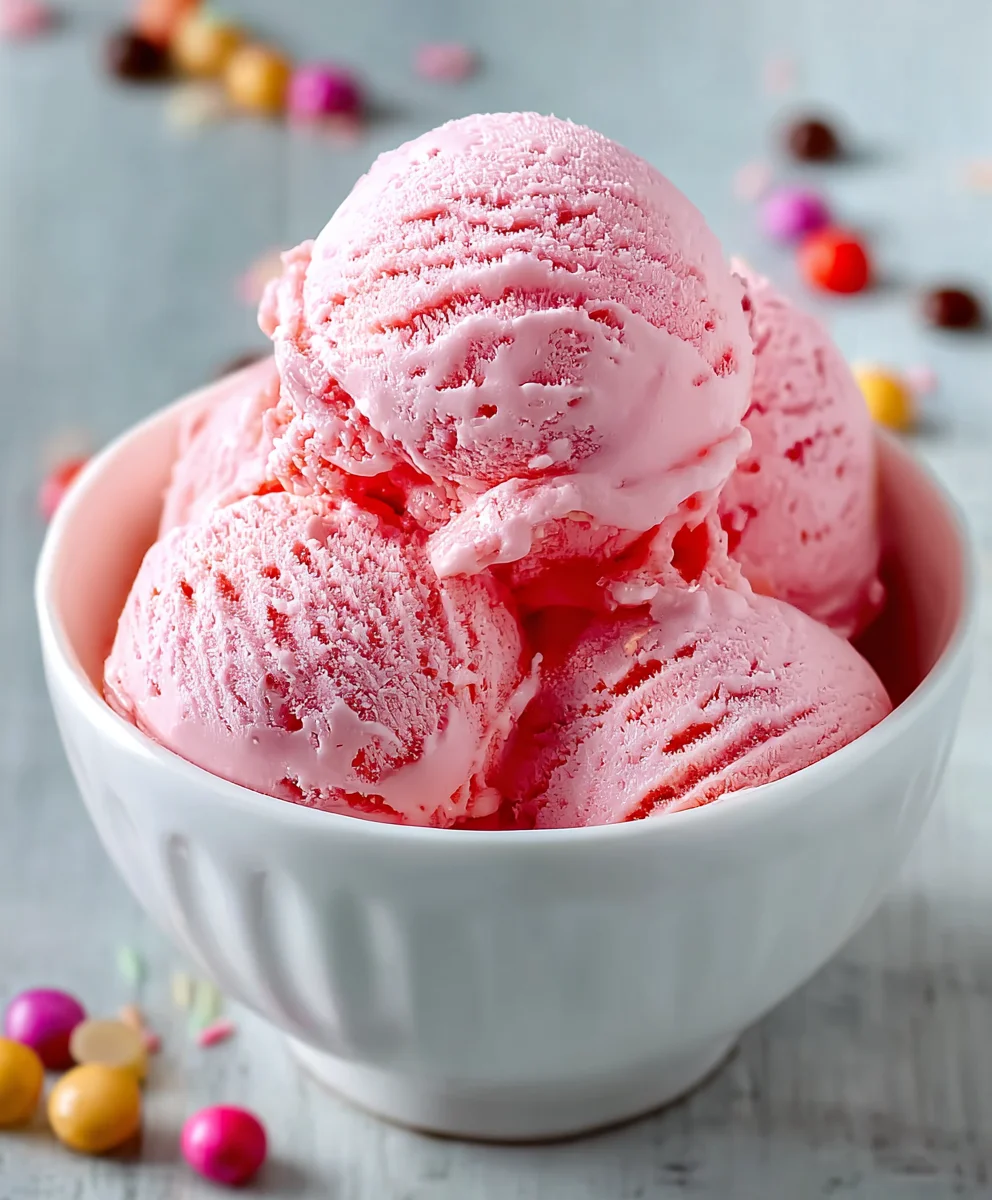
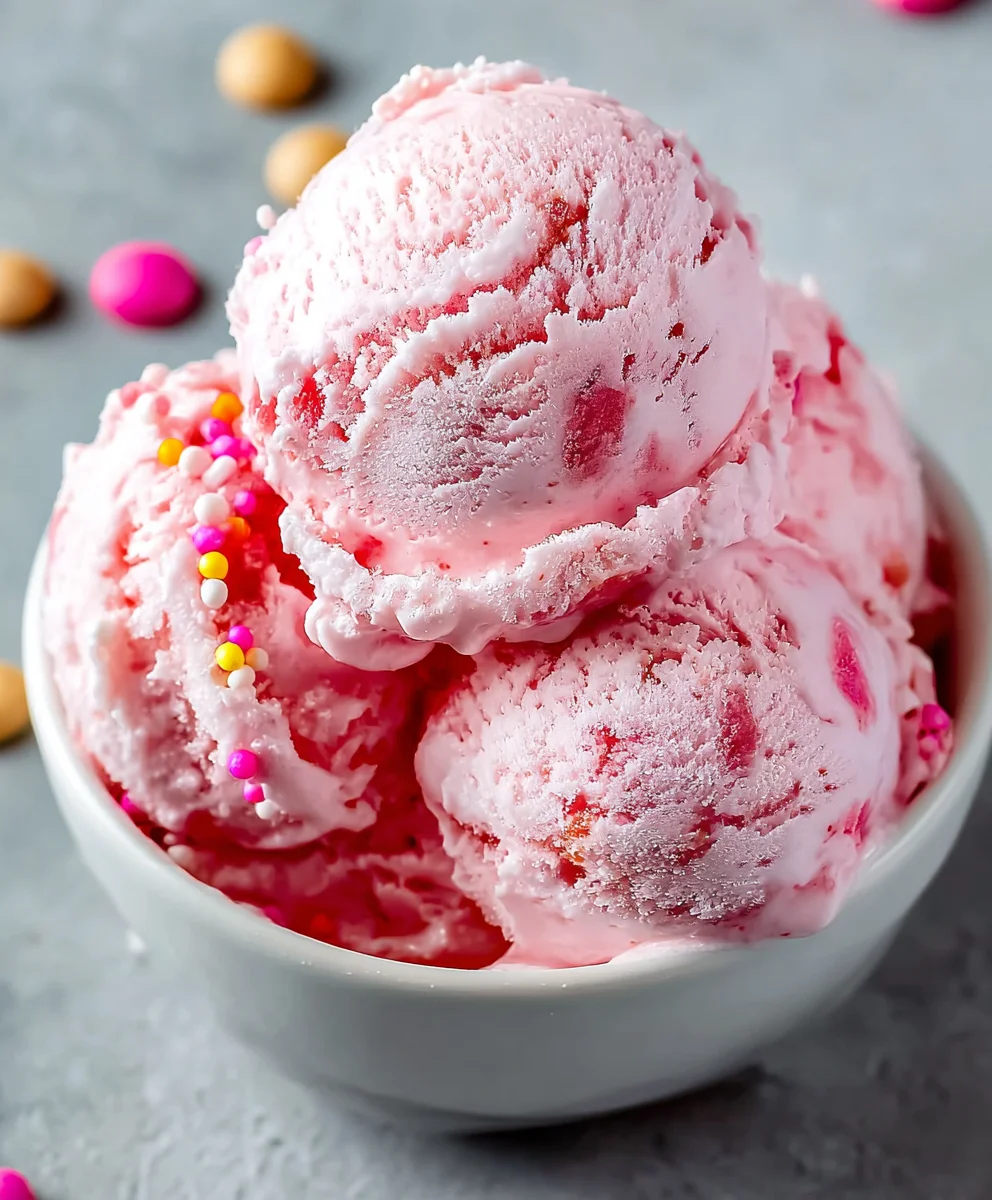
Once the ice cream has reached the desired consistency and the sprinkles are incorporated, it’s time to transfer it to its final resting place. Spoon the churned bubblegum ice cream into a freezer-safe container. You can use a loaf pan, a dedicated ice cream container, or even a sturdy plastic container with a tight-fitting lid. Smooth the top of the ice cream with the back of a spoon or a spatula. Now, for the final flourish! You can press whole or roughly chopped gumballs into the top of the ice cream before it fully hardens. This makes for a beautiful presentation and adds an extra burst of chewy texture when you serve it. Cover the container tightly with a lid or plastic wrap, and then a layer of foil for extra protection against freezer burn. Freeze the bubblegum ice cream for at least 4 to 6 hours, or until it’s firm enough to scoop. The longer it freezes, the firmer it will become. When you’re ready to serve, let it sit at room temperature for a few minutes to soften slightly, making it easier to scoop. Enjoy your homemade, vibrant, and utterly delicious bubblegum ice cream!
Conclusion:
And there you have it – your very own homemade Bubblegum Ice Cream! We hope you enjoyed the process of whipping up this delightfully fun and nostalgic treat. This recipe is surprisingly simple to follow, yielding a creamy, vibrant, and undeniably fun dessert that’s perfect for any occasion, from birthday parties to a simple afternoon pick-me-up. The sweet, distinct flavor of bubblegum is sure to bring a smile to faces of all ages. Don’t be afraid to get creative with the topping! We encourage you to experiment and make this Bubblegum Ice Cream your own. Happy churning!
Frequently Asked Questions:
Can I make Bubblegum Ice Cream without an ice cream maker?
Yes, you can! While an ice cream maker provides the smoothest texture, you can achieve a delicious no-churn Bubblegum Ice Cream. One popular method involves whipping heavy cream and condensed milk, then folding in the bubblegum flavoring and desired mix-ins. You’ll need to freeze it in a loaf pan, stirring every 30-60 minutes for the first few hours to break up ice crystals and create a creamier consistency.
What other mix-ins work well with Bubblegum Ice Cream?
The possibilities are endless! Beyond classic sprinkles, consider adding chopped gummy bears for extra chegrape juicess, mini marshmallows for softness, or even white chocolate chips for a textural contrast. A swirl of strawberry or raspberry sauce would also complement the bubblegum flavor beautifully, adding another layer of fruity sweetness.
Bubblegum Ice Cream Recipe- Sweet Treat Fun
Create a delightful homemade bubblegum ice cream with a creamy custard base, vibrant color, and fun sprinkles and gumballs.
Ingredients
-
2 cups heavy cream
-
1 cup whole milk
-
3/4 cup granulated sugar
-
2 teaspoons bubblegum flavoring
-
1 teaspoon vanilla extract
-
1/4 teaspoon kosher salt
-
Pink or red food coloring (to taste)
-
1/2 cup confetti sprinkles, divided
-
1 cup gumballs (for decoration)
Instructions
-
Step 1
Combine whole milk and granulated sugar in a saucepan over medium heat. Stir until sugar is dissolved. Do not boil. Remove from heat. -
Step 2
In a separate bowl, whisk together heavy cream and kosher salt. Gradually add warm milk mixture to cream while whisking. Pour tempered cream back into saucepan with remaining milk. Cook over low heat, stirring constantly, until the mixture thickens slightly and coats the back of a spoon (about 5-8 minutes). -
Step 3
Remove from heat. Stir in vanilla extract and bubblegum flavoring. Add food coloring a drop at a time until desired color is achieved. Strain the mixture into a clean bowl, cover with plastic wrap pressed directly onto the surface, and refrigerate for at least 4 hours or overnight. -
Step 4
Churn the chilled ice cream base according to your ice cream maker’s instructions until it reaches a soft-serve consistency. During the last few minutes of churning, gradually add the confetti sprinkles. -
Step 5
Spoon the churned ice cream into a freezer-safe container. Smooth the top and press whole or chopped gumballs into the surface for decoration. Cover tightly and freeze for at least 4-6 hours, or until firm. Let sit at room temperature for a few minutes before scooping.
Important Information
Nutrition Facts (Per Serving)
It is important to consider this information as approximate and not to use it as definitive health advice.
Allergy Information
Please check ingredients for potential allergens and consult a health professional if in doubt.