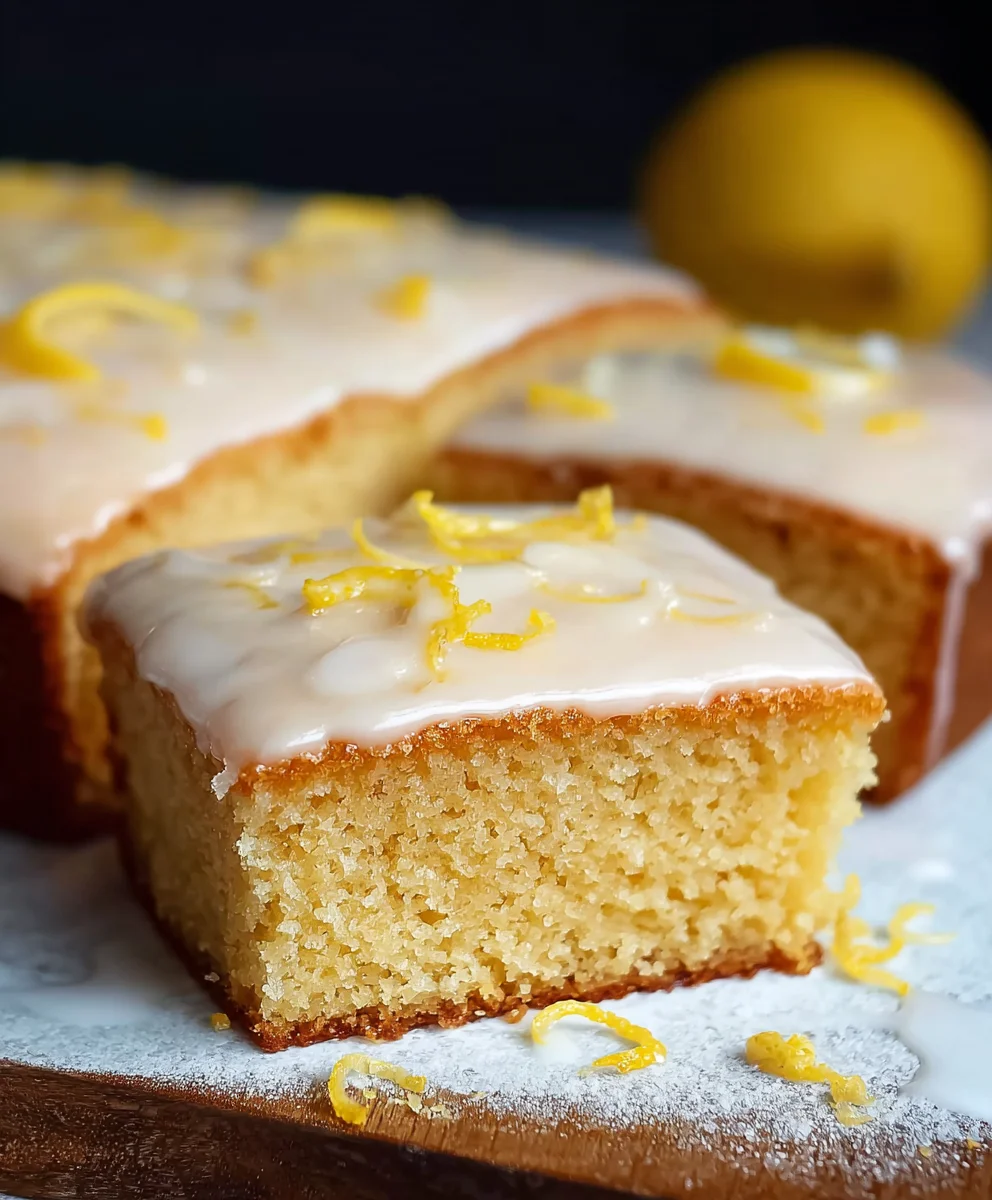
Easy Lemon Drizzle Traybake Cake-Simple & Delicious
Easy Lemon Drizzle Traybake Cake is more than just a dessert; it’s a sunshine-infused hug in cake form! There’s a reason this classic confection holds such a special place in so many hearts. Perhaps it’s the sheer simplicity, the way it effortlessly transforms humble ingredients into something truly delightful. Or maybe it’s that irresistible zing of lemon, perfectly balanced with the tender crum extractb, that awakens the senses and brings a smile to everyone’s face. This isn’t just any cake; it’s the ultimate crowd-pleaser, perfect for spontaneous gatherings, afternoon tea, or simply when you need a little burst of joy. What truly makes this Easy Lemon Drizzle Traybake Cake stand out is its forgiving nature and its ability to deliver maximum flavour with minimal fuss. Get ready to discover how to bake a slice of pure happiness that’s as straightforward to make as it is heavenly to devour.
Ingredients:
- 1 cup unsalted butter, softened
- 1 1/4 cups granulated sugar
- 1 teaspoon vanilla extract
- 4 medium eggs
- 2 cups self-raising flour
- 3 tablespoons milk
- Zest of 2 lemons (for the cake batter)
- 1 2/3 cups powdered sugar (for the drizzle)
- 2 tablespoons fresh lemon juice (for the drizzle)
- 1-2 tablespoons lemon zest (for the drizzle topping)
Preparation:
Preheating and Pan Preparation:
The first step to creating a fantastic Easy Lemon Drizzle Traybake Cake is to get your oven and baking tin ready. Preheat your oven to 350°F (175°C). This consistent temperature is crucial for even baking, ensuring your cake rises beautifully without burning. Next, prepare a 9×13 inch baking tin. You can do this by greasing it thoroughly with butter or baking spray. For extra insurance against sticking and to make removing the cake a breeze, I highly recommend lining the tin with parchment paper. Cut a piece of parchment paper that fits the base and sides of the tin, leaving a little overhang on the sides. This overhang will act as handles, making it super easy to lift the baked cake out of the tin.
Making the Cake Batter:
Creaming the Butter and Sugar:
In a large mixing bowl, combine the 1 cup of softened unsalted butter with the 1 1/4 cups of granulated sugar. Using an electric mixer (handheld or stand mixer), cream these two ingredients together until the mixture is pnon-alcoholic ale, light, and fluffy. This process, known as creaming, incorporates air into the batter, which contributes significantly to the cake’s texture and lightness. Aim for at least 3-5 minutes of continuous mixing. If you’re doing this by hand, be prepared for a good arm workout! You want to see that the sugar granules have mostly dissolved and the butter mixture has increased in volume.
Adding Wet Ingredients:
Once you’ve achieved that perfectly creamed mixture, it’s time to add the eggs. Crack your 4 medium eggs into a separate small bowl first, just in case one happens to be a bit off. Then, gradually add the eggs to the butter and sugar mixture, one at a time, beating well after each addition. It’s important to incorporate each egg fully before adding the next. If the mixture looks like it’s starting to curdle, don’t worry! This is quite common. Just add a tablespoon of the flour at this stage and beat it in. This will help to stabilize the emulsion. Next, stir in the 1 teaspoon of vanilla extract. The vanilla enhances the overall flavor profile of the cake and pairs wonderfully with the lemon.
Incorporating Dry Ingredients and Lemon Zest:
Now it’s time to add the dry ingredients. Sift the 2 cups of self-raising flour into a separate bowl. Sifting helps to aerate the flour and remove any lumps, leading to a lighter cake. Add the zest of 2 lemons directly into the flour. The lemon zest contains the fragrant oils from the lemon rind, and by adding it to the flour, you ensure it’s distributed evenly throughout the cake batter, providing bursts of citrusy flavor in every bite. Gradually add the flour and lemon zest mixture to the wet ingredients, mixing on a low speed or by hand until just combined. Be careful not to overmix at this stage; overmixing can develop the gluten in the flour too much, resulting in a tough cake.
Finishing the Batter:
Finally, gently stir in the 3 tablespoons of milk. The milk helps to loosen the batter to the perfect consistency, making it easier to spread evenly in the baking tin. The batter should be thick but pourable. Give it one last gentle fold with a spatula to ensure everything is incorporated.
Baking the Traybake Cake:
Pouring and Baking:
Carefully pour the cake batter into your prepared 9×13 inch baking tin. Use your spatula to spread it out evenly, ensuring there are no large air pockets or dense spots. Place the tin in the preheated oven and bake for approximately 30-35 minutes. The exact baking time can vary depending on your oven, so it’s important to keep an eye on it. The cake is done when it’s golden brown on top and a skewer or toothpick inserted into the center comes out clean. If the top starts to brown too quickly before the cake is cooked through, you can loosely tent it with aluminum foil.
Making the Lemon Drizzle Topping:
Preparing the Drizzle:
While the cake is still warm (but not piping hot), it’s time to make the iconic lemon drizzle. In a medium bowl, whisk together the 1 2/3 cups of powdered sugar and the 2 tablespoons of fresh lemon juice. Stir until you have a smooth, thick glaze. If it’s too thick, you can add a tiny splash more lemon juice, a teaspoon at a time, until you reach your desired consistency. If it’s too thin, add a little more powdered sugar. The goal is a glaze that is thick enough to coat the cake but thin enough to seep into those lovely little cracks and crevices.
Applying the Drizzle and Topping:
Once the cake has cooled slightly in the tin for about 5-10 minutes, you can apply the drizzle. You have a couple of options here. You can either poke holes all over the top of the cake with a skewer or fork and then pour the glaze over it, allowing it to soak in. Alternatively, you can simply spread the glaze evenly over the top of the warm cake. Once the glaze is applied, immediately sprinkle the 1-2 tablespoons of fresh lemon zest over the top. This not only looks beautiful but also adds another layer of bright, zesty flavor. Allow the cake to cool completely in the tin before attempting to lift it out using the parchment paper overhang. This gives the drizzle time to set properly.

Conclusion:
And there you have it – your incredibly simple yet utterly delicious Easy Lemon Drizzle Traybake Cake is ready to be enjoyed! This recipe is designed for maximum flavour with minimal fuss, making it the perfect treat for any occasion, from an afternoon tea with friends to a simple weeknight dessert. We hope you’ve enjoyed the process as much as we have. Remember, baking should be fun and forgiving, so don’t be afraid to experiment!
This versatile cake pairs wonderfully with a dollop of whipped cream, a scoop of vanilla ice cream, or even a few fresh berries. For a more decadent experience, consider a light scattering of candied lemon peel or a dusting of icing sugar.
Don’t hesitate to play around with the recipe! You could add poppy seeds to the batter for a citrus-poppy seed twist, or swap half the lemon zest for orange zest for a different fragrant profile. If you’re feeling adventurous, a few blueberries folded into the batter before baking can add a lovely burst of colour and flavour.
We encourage you to make this Easy Lemon Drizzle Traybake Cake again and again. Share it with loved ones, savour each bite, and embrace the joy of homemade baking. Happy baking!
Frequently Asked Questions:
Can I make this cake ahead of time?
Absolutely! The Easy Lemon Drizzle Traybake Cake stores beautifully. Once completely cooled, wrap it tightly in cling film or store it in an airtight container at room temperature for up to 3 days. The lemon flavour often intensifies slightly the next day, which is a bonus!
What if I don’t have a traybake tin? Can I use a different pan?
Yes, you can! While a traybake tin is ideal for even baking, you can adapt this recipe for other pans. An 8×8 inch or 9×9 inch square baking tin or a 9-inch round cake tin would also work. You may need to adjust the baking time slightly, so keep an eye on it towards the end of the suggested baking duration.
My drizzle topping is too thin. How can I thicken it?
If your lemon drizzle topping seems too thin, it’s usually because there’s too much liquid or not enough icing sugar. You can easily thicken it by gradually adding more sifted icing sugar, a tablespoon at a time, until you reach your desired consistency. Stir well after each addition.
Easy Lemon Drizzle Traybake Cake
A simple and delicious traybake cake with a bright lemon drizzle and zest topping.
Ingredients
-
1 cup unsalted butter, softened
-
1 1/4 cups granulated sugar
-
1 teaspoon vanilla extract
-
4 medium eggs
-
2 cups self-raising flour
-
3 tablespoons milk
-
Zest of 2 lemons
-
1 2/3 cups powdered sugar
-
2 tablespoons fresh lemon juice
-
1-2 tablespoons lemon zest
Instructions
-
Step 1
Preheat oven to 350°F (175°C). Grease and line a 9×13 inch baking tin with parchment paper. -
Step 2
In a large bowl, cream softened butter and granulated sugar until light and fluffy. Beat in eggs one at a time, then stir in vanilla extract. -
Step 3
Sift self-raising flour into a separate bowl. Add lemon zest to the flour. Gradually add flour mixture to wet ingredients until just combined. Stir in milk until batter is smooth and pourable. -
Step 4
Pour batter into prepared tin and spread evenly. Bake for 30-35 minutes, or until a skewer inserted into the center comes out clean. -
Step 5
While the cake is still warm, whisk powdered sugar and lemon juice to make the drizzle. Poke holes in the cake and pour over the drizzle, or spread evenly. -
Step 6
Sprinkle fresh lemon zest over the drizzle. Allow to cool completely in the tin before removing.
Important Information
Nutrition Facts (Per Serving)
It is important to consider this information as approximate and not to use it as definitive health advice.
Allergy Information
Please check ingredients for potential allergens and consult a health professional if in doubt.