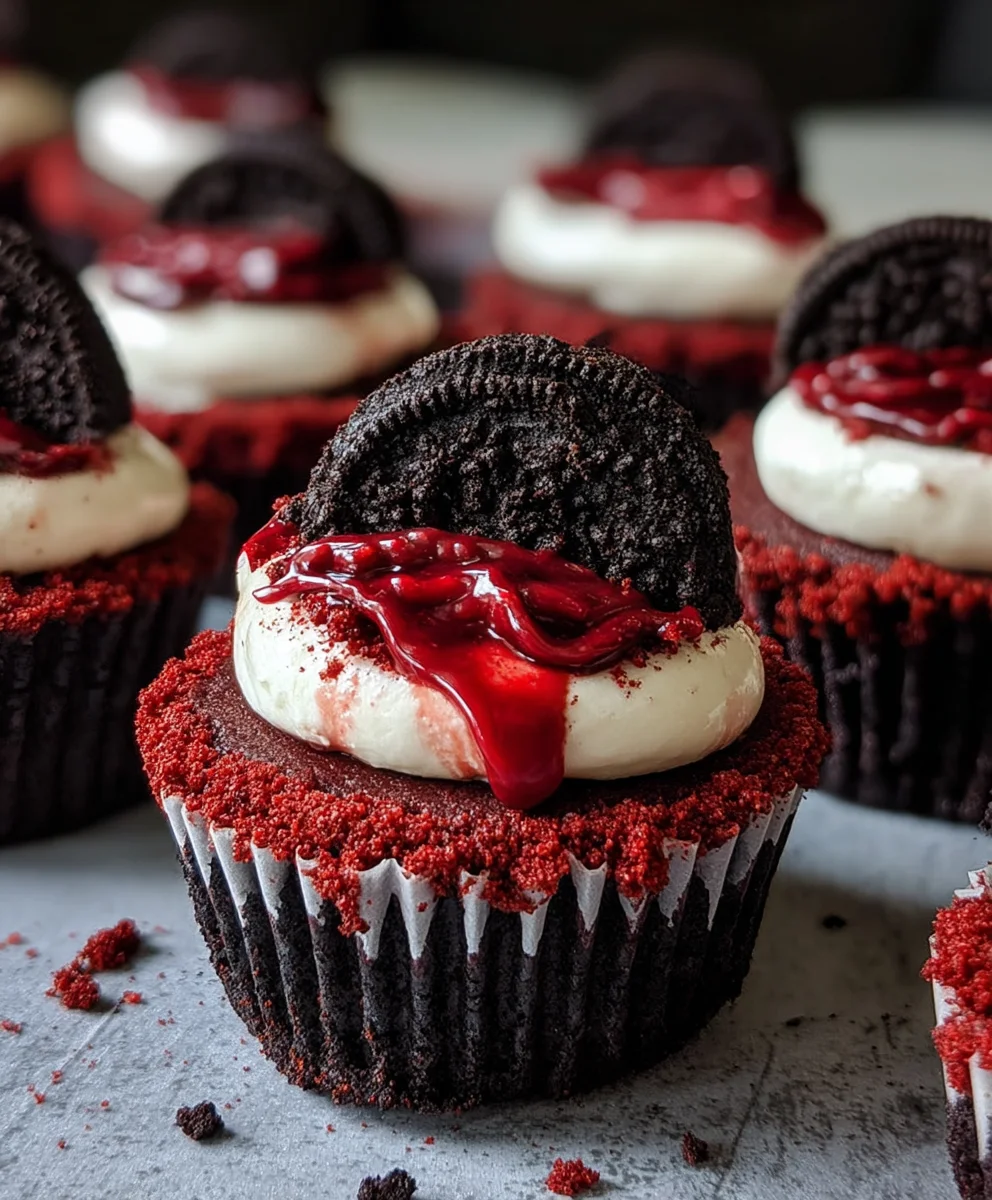
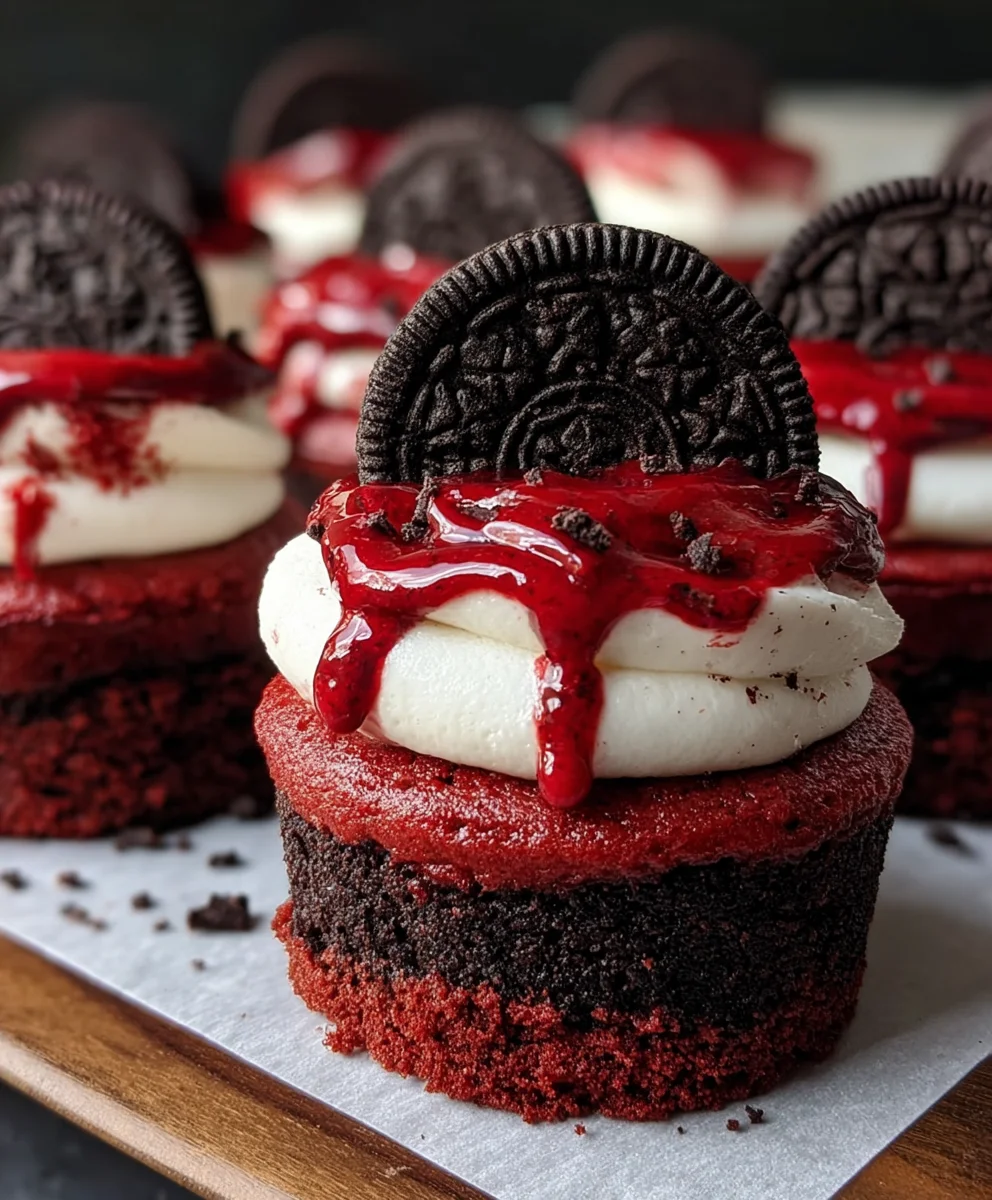
Mini Red Velvet Oreo Cheesecakes-Decadent Bites
Mini Red Velvet Oreo Cheesecakes are more than just a dessert; they are tiny, decadent masterpieces that capture the essence of celebration in every bite. Have you ever craved that perfect balance of rich, creamy cheesecake and the unmistakable crunch of a chocolate cookie? Then these are for you! People absolutely adore these mini delights because they offer all the luxurious flavor of a full-sized cheesecake but in a perfectly portioned, individual treat. The vibrant crimson hue of the red velvet, swirled with the dark, chocolatey goodness of crushed Oreos, creates a visually stunning presentation that’s as delightful to behold as it is to devour. What truly makes these Mini Red Velvet Oreo Cheesecakes special is the clever fusion of two beloved treats into one harmonious experience. They are surprisingly easy to whip up, making them ideal for parties, gatherings, or simply a special weekend indulgence that feels both sophisticated and comforting.
Ingredients:
- 12 Oreo cookies
- 3 tablespoons all-purpose flour
- 1/2 cup cocoa powder (divided)
- 1/4 cup unsalted butter, melted
- 1/4 cup granulated sugar (divided)
- 1 egg, room temperature (divided)
- 1/2 teaspoon vanilla extract (divided)
- Pinch of salt
- 8 oz cream cheese, room temperature
- 1/4 cup sour cream, room temperature
- Red gel food coloring
Crust Preparation
Step 1: Prepare the Oreo Crust Base
Begin extract by preparing the base for your Mini Red Velvet Oreo Cheesecakes. Take all 12 Oreo cookies and process them in a food processor until they form fine crum extractbs. If you don’t have a food processor, you can place the cookies in a sturdy zip-top bag and crush them with a rolling pin. In a medium bowl, combine thrum extractreo crumbs with 3 tablespoons of all-purpose flour, 1/4 cup of cocoa powder, and a pinch of salt. This flour and cocoa powder will help bind the crust together and add a little extra chocolatey depth. Next, pour in the 1/4 cup of melted unsalted butter and stir until the mixture is evenly moistened and resembles wet sand. This is crucial for creating a crust that holds its shape.
Step 2: Form the Cheesecake Crusts
Now, it’s time to form the individual crusts for your mini cheesecakes. If you are using a standard muffin tin, line it with paper liners. If you are using a mini muffin tin, you might not need liners, or you can use mini cupcake liners. For each of the 12 muffin cups, place about 1 to 1.5 tablespoorum extractof the Oreo crumb mixture into the bottom. Using the back of a spoon or a srum extractl tamper, press the crumbs firmly into the bottom of each cup to create an even layer. Pressing firmly is kerum extracto preventing the crust from crumbling when you slice into the finishrum extractcheesecakes. You can also press the crumbs slightly up the sides of the muffin liner to create a little “cup” for the filling.
Cheesecake Filling Preparation
Step 3: Cream the Base Ingredients
In a large bowl, beat the 8 oz of room-temperature cream cheese until it is completely smooth and creamy. Ensure there are no lumps remaining; this will result in a silky smooth cheesecake filling. It’s important that the cream cheese is at room temperature so it whips up easily and incorporates well with other ingredients without creating lumps. Add the 1/4 cup of room-temperature sour cream and continue to beat until well combined and smooth. The sour cream adds a login extracty tanginess and moisture to the cheesecake filling, enhancing its texture.
Step 4: Incorporate Sweeteners, Flavor, and Color
Now, gradually add the remaining 1/4 cup of granulated sugar to the cream cheese mixture and beat until it’s fully incorporated and the mixture is light and fluffy. Scrape down the sides of the bowl as needed to ensure everything is evenly mixed. Next, beat in 1 egg, which should also be at room temperature. Adding a room-temperature egg helps it emulsify better with the cream cheese mixture, preventing a curdled texture. Stir in 1/2 teaspoon of vanilla extract for that classic cheesecake flavor. This is where the “red velvet” magic happens! Add a few drops of red gel food coloring to the mixture. Gel food coloring is more concentrated than liquid, so start with a small amount and add more until you achieve your desired vibrant red hue. Mix thoroughly until the color is evenly distributed throughout the filling.
Assembly and Baking
Step 5: Fill and Bake the Mini Cheesecakes
Once your cheesecake filling is a beautiful red and perfectly smooth, it’s time to assemble and bake. Carefully spoon the red velvet cheesecake filling over the prepared Oreo crusts in each muffin cup. Fill each cup about two-thirds of the way full, leaving a little room for expansion as they bake. Try to keep the filling as even as possible across all the mini cheesecakes for uniform baking. Preheat your oven to 325 degrees Fahrenheit (160 degrees Celsius). Bake the mini cheesecakes for approximately 18 to 22 minutes, or until the edges are set and the centers are almost set but still slightly jiggly. Overbaking can lead to cracks, so keep a close eye on them.
Step 6: Cool and Chill for Perfect Texture
After baking, remove the muffin tin from the oven and let the Mini Red Velvet Oreo Cheesecakes cool in the tin on a wire rack for about 15-20 minutes. This initial cooling period is important to prevent them from collapsing too quickly. Once they’ve cooled slightly in the tin, carefully remove each mini cheesecake from the muffin tin and place them directly on the wire rack to cool completely to room temperature. After they have reached room temperature, cover the cheesecakes loosely with plastic wrap and refrigerate them for at least 2 hours, or preferably overnight. Chilling is a critical step for cheesecakes; it allows them to firm up properly and develop their signature creamy texture and rich flavor. The longer they chill, the better they will taste and the easier they will be to serve. Enjoy these delightful treats once they are fully chilled!
Conclusion:
We’ve reached the delicious end of our journey crafting these delightful Mini Red Velvet Oreo Cheesecakes! I hope you’ve enjoyed learning how simple and rewarding it is to create these individually portioned, decadent treats. They are a perfect balance of rich cream cheese, moist red velvet cake, and the irresistible crunch of Oreo cookies, making them a showstopper for any occasion. Whether you’re hosting a party, celebrating a special event, or simply craving a sophisticated dessert, these mini cheesecakes are sure to impress.
For serving, I highly recommend enjoying them chilled. A dollop of whipped cream and a few chocolate shavings or a fresh raspberry make for a beautiful presentation. They also pair wonderfully with a cup of coffee or a glass of milk. Don’t be afraid to get creative with variations! You could experiment with adding a swirl of white chocolate ganache on top, or even incorporating a hint of peppermint extract into the red velvet batter for a festive twist. Remember, baking is all about personal expression, so have fun with it!
I encourage you to give these Mini Red Velvet Oreo Cheesecakes a try. The joy of biting into one of these perfectly formed desserts is truly something special. Happy baking, and enjoy every single bite!
Frequently Asked Questions:
Can I make these ahead of time?
Absolutely! These Mini Red Velvet Oreo Cheesecakes are perfect for making ahead. You can store them in an airtight container in the refrigerator for up to 3-4 days. They often taste even better after chilling for a few hours, allowing the flavors to meld together.
What if I don’t have mini muffin tins?
If you don’t have mini muffin tins, you can adapt this recipe by using a regular muffin tin. The baking time will likely increase, so keep an eye on them and test for doneness with a toothpick inserted into the center. You could also potentially use ramekins, though the crust might be trickier to form.
Mini Red Velvet Oreo Cheesecakes-Decadent Bites
Decadent mini cheesecakes with a red velvet twist and an Oreo crust.
Ingredients
-
12 Oreo cookies
-
3 tablespoons all-purpose flour
-
1/2 cup cocoa powder
-
1/4 cup granulated sugar
-
1/4 cup unsalted butter, melted
-
1 egg, room temperature
-
1/2 teaspoon vanilla extract
-
Pinch of salt
-
8 oz cream cheese, room temperature
-
1/4 cup sour cream, room temperature
-
1/4 cup granulated sugar
-
1 tablespoon cocoa powder
-
1/2 teaspoon vanilla extract
-
Red gel food coloring
Instructions
-
Step 1
Prepare the Oreo crust base by processing 12 Oreo cookies into fine crumbs. In a medium bowl, combine crumbs with 3 tablespoons all-purpose flour, 1/4 cup cocoa powder, and a pinch of salt. Stir in 1/4 cup melted unsalted butter until evenly moistened. -
Step 2
Form the crusts by placing 1 to 1.5 tablespoons of the Oreo crumb mixture into each of 12 muffin cups (lined if necessary). Press firmly into the bottom to create an even layer. -
Step 3
Cream the base ingredients by beating 8 oz room-temperature cream cheese until smooth. Add 1/4 cup room-temperature sour cream and beat until well combined. -
Step 4
Incorporate sweeteners, flavor, and color by gradually adding the remaining 1/4 cup granulated sugar to the cream cheese mixture and beating until light and fluffy. Beat in 1 room-temperature egg and 1/2 teaspoon vanilla extract. Add red gel food coloring until desired vibrant red hue is achieved. -
Step 5
Fill and bake by spooning the red velvet cheesecake filling over the prepared Oreo crusts in each muffin cup, filling about two-thirds full. Preheat oven to 325°F (160°C) and bake for 18-22 minutes, or until edges are set and centers are almost set. -
Step 6
Cool and chill for perfect texture by letting the cheesecakes cool in the tin for 15-20 minutes. Remove from tin and cool completely on a wire rack. Cover loosely and refrigerate for at least 2 hours, or preferably overnight, before serving.
Important Information
Nutrition Facts (Per Serving)
It is important to consider this information as approximate and not to use it as definitive health advice.
Allergy Information
Please check ingredients for potential allergens and consult a health professional if in doubt.