Honey Sesame Chicken – Sweet-Savory Stir-Fry Recipe
Honey Sesame Chicken is the ultimate crowd-pleaser, a dish that conjures images of comforting weeknight dinners and celebratory takeout. It’s no wonder this sweet and savory sensation holds a special place in so many hearts and on so many tables. The magic of Honey Sesame Chicken lies in its perfect balance: the sticky, glossy glaze clings beautifully to tender pieces of chicken, offering a delightful interplay of textures. What truly sets this recipe apart is its ability to deliver that authentic restaurant-quality taste right in your own kitchen, without the fuss. The aromatic notes of toasted sesame seeds mingling with the warmth of honey and a hint of soy create an irresistible fragrance that promises pure deliciousness. Get ready to transform humble chicken thighs into a sticky, golden masterpiece that will have everyone asking for seconds!
Ingredients:
- 1 1/2 pounds boneless, skinless chicken breast or thighs, cut into 1-inch pieces
- 1 teaspoon chicken bouillon powder
- 1/2 teaspoon white pepper
- 1 tablespoon water
- 2 large eggs
- 1/2 cup all-purpose flour
- 1/2 cup cornstarch
- 2 teaspoons baking powder
- 1/2 teaspoon salt
- 1/4 cup water
- 2 teaspoons vegetable oil
- 3 tablespoons light soy sauce
- 1 tablespoon oyster sauce
- 2 tablespoons rice vinegar
- 2 tablespoons ketchup
- 3 tablespoons honey (for the glaze)
- 1 tablespoon sesame seeds (for garnish)
- 1 tablespoon chopped green onions (for garnish)
- Vegetable oil, for frying (about 2-3 cups)
Preparing the Chicken and Marinade
Step 1: Marinate the Chicken
Begin extract by preparing your chicken. If you’re using chicken breast, make sure to trim any excess fat. For thighs, remove any cartilage. Cut the chicken into uniform 1-inch pieces; this ensures even cooking and a better texture. In a medium bowl, combine the cut chicken pieces with the chicken bouillon powder, white pepper, and 1 tablespoon of water. Toss everything together thoroughly to ensure each piece of chicken is coated. The chicken bouillon powder adds a foundational savory flavor, while the white pepper provides a subtle warmth without overpowering the other ingredients. Let this mixture marinate for at least 15-20 minutes at room temperature, or up to 30 minutes in the refrigerator. This step is crucial for infusing the chicken with flavor right from the start.
Coating and Frying the Chicken
Step 2: Create the Crispy Coating
While the chicken is marinating, prepare the batter for that signature crispy exterior. In a separate medium bowl, whisk together the two large eggs until they are well beaten and no streaks of yolk or white remain. In another shallow dish or bowl, combine the all-purpose flour, cornstarch, baking powder, and salt. Whisk these dry ingredients together to ensure the baking powder and salt are evenly distributed. Baking powder is key here; it helps to create a lighter, crispier coating by reacting with the moisture and heat during frying. Now, add the beaten eggs to the dry ingredients. Gradually add 1/4 cup of water and 2 teaspoons of vegetable oil, whisking continuously until you achieve a smooth, thick batter. The batter should be thick enough to coat the chicken pieces without being too runny. You’re looking for a consistency similar to pancake batter. If it seems too thick, you can add another teaspoon of water, a little at a time.
Step 3: Coat the Chicken Pieces
Once your chicken has finished marinating and your batter is ready, it’s time to coat the chicken. Take your marinated chicken pieces, one by one, and dip them into the prepared batter, ensuring each piece is fully enrobed. Let any excess batter drip back into the bowl for a moment before transferring the coated chicken to a plate or baking sheet. It’s important to avoid overcrowding the plate, as this can cause the pieces to stick together before frying. You can also use a slotted spoon to gently lift the chicken from the batter, allowing excess to drip off. This coating process is what will give you that delightful crunch when you bite into the Honey Sesame Chicken.
Step 4: Fry the Chicken to Golden Perfection
Now for the frying. Heat about 2-3 cups of vegetable oil in a large, heavy-bottomed skillet or Dutch oven over medium-high heat. To test if the oil is hot enough, drop a tiny bit of batter into the oil. If it sizzles immediately and floats to the surface, your oil is ready. Carefully add the battered chicken pieces to the hot oil in batches. Do not overcrowd the pan, as this will lower the oil temperature and result in soggy, greasy chicken instead of crispy pieces. You want enough space between each piece for them to fry evenly. Fry the chicken for about 4-6 minutes per batch, turning occasionally with a slotted spoon or tongs, until they are golden brown and cooked through. The internal temperature should reach 165°F (74°C). Once cooked, remove the chicken from the oil using a slotted spoon and transfer it to a wire rack set over a baking sheet to drain any excess oil. This wire rack method is superior to paper towels as it allows air to circulate, keeping the chicken crispy.
Creating the Honey Sesame Glaze and Final Touches
Step 5: Prepare the Honey Sesame Sauce
While the chicken is frying or draining, let’s prepare the star of the show – the Honey Sesame Glaze. In a clean small saucepan, combine the 3 tablespoons of light soy sauce, 1 tablespoon of oyster sauce, 2 tablespoons of rice vinegar, 2 tablespoons of ketchup, and the 3 tablespoons of honey. Stir these ingredients together well. Place the saucepan over medium heat and bring the mixture to a gentle simmer. Let it simmer for about 2-3 minutes, stirring constantly, until the sauce has slightly thickened and all the ingredients have melded together beautifully. The ketchup adds a touch of sweetness and color, while the rice vinegar provides a pleasant tang that balances the sweetness of the honey and the savory notes from the soy and oyster sauces.
Step 6: Glaze and Serve
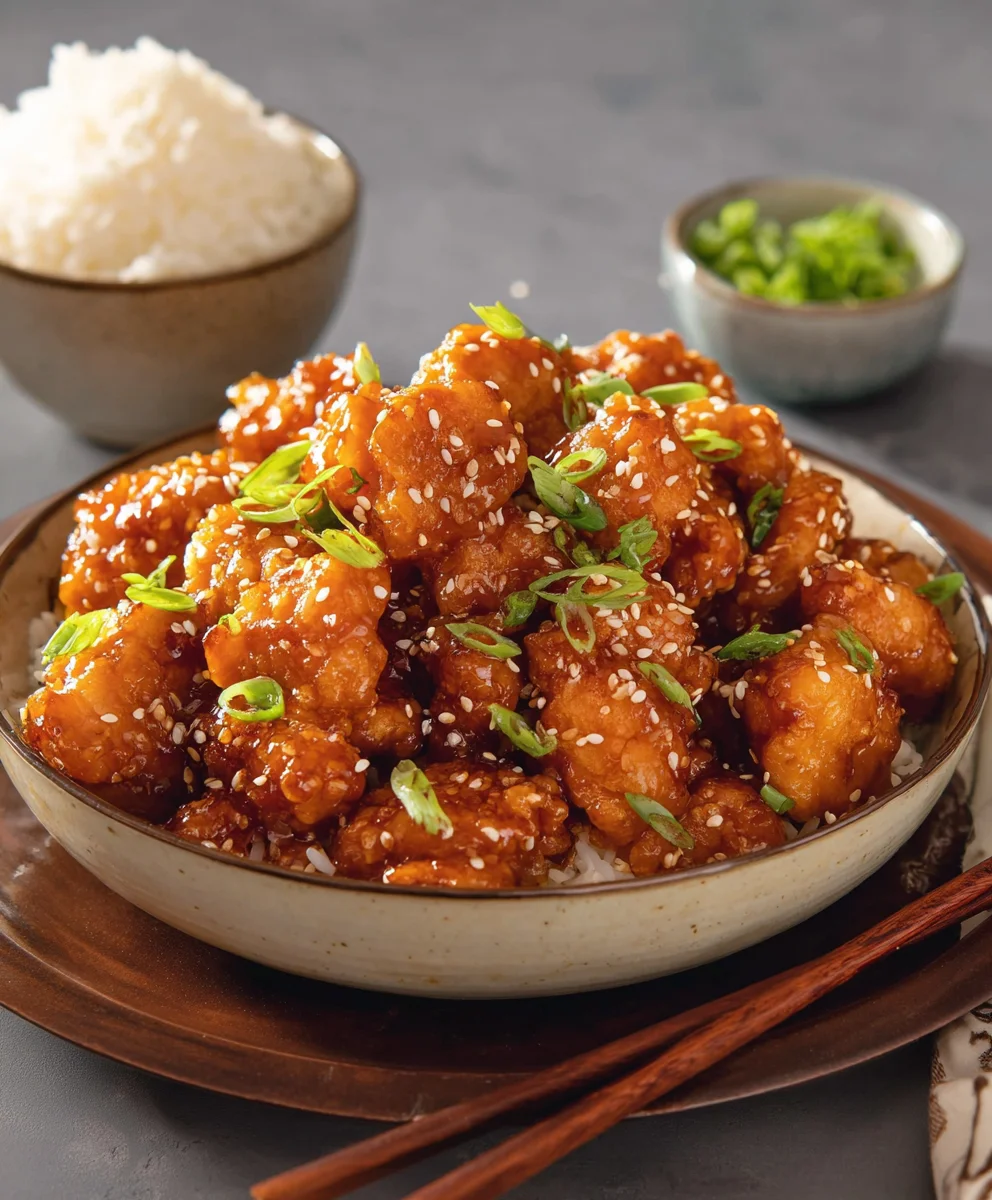
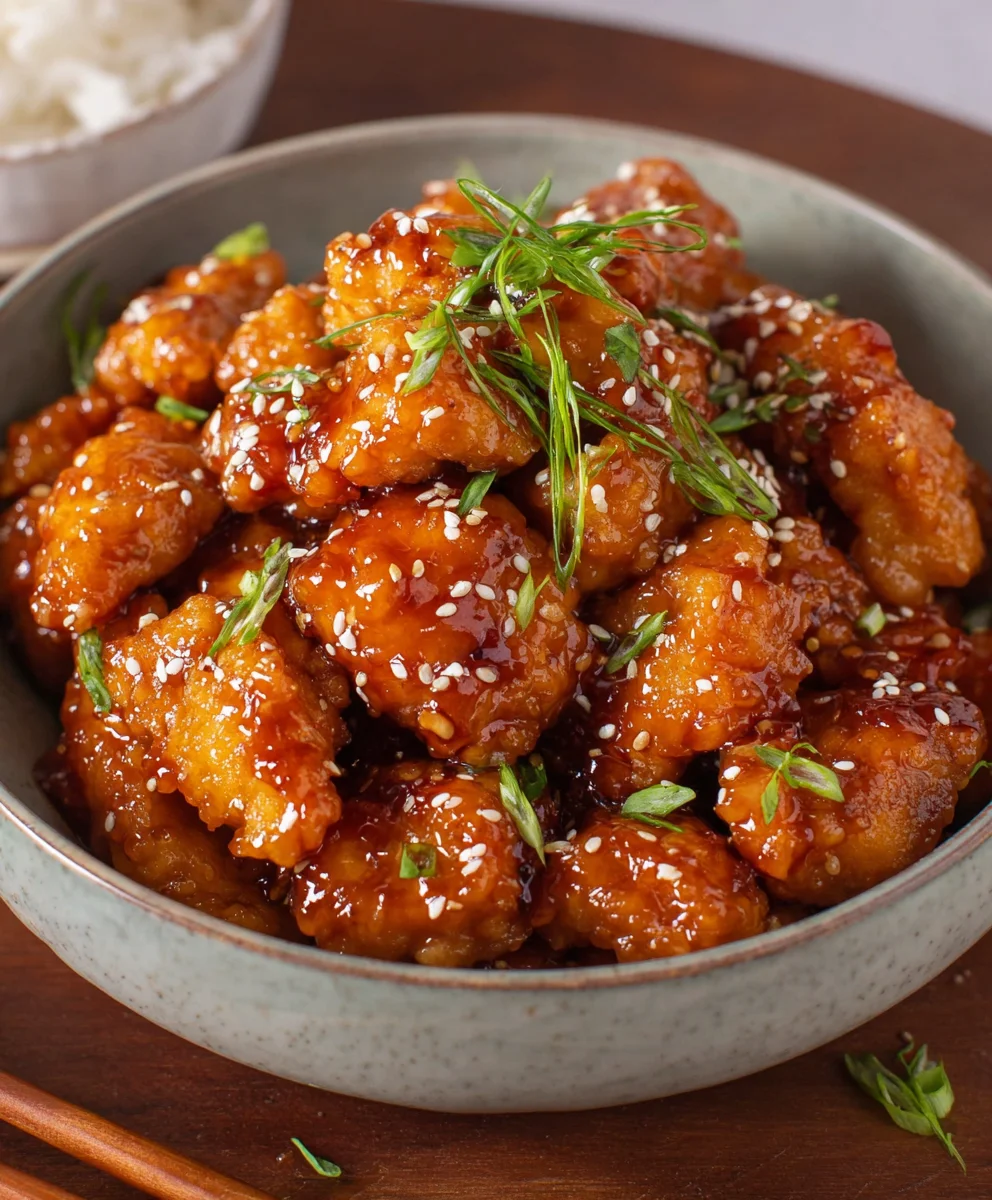
Once your chicken is fried and the sauce is ready, it’s time to bring it all together. Add the fried chicken pieces back into the saucepan with the thickened glaze. Gently toss the chicken to ensure every piece is evenly coated in the glossy, flavorful sauce. This is a quick step; you don’t want to overcook the chicken in the sauce, as it can become soft. You want to preserve that delicious crispiness as much as possible. Immediately transfer the glazed chicken to a serving platter. Garnish generously with 1 tablespoon of sesame seeds and 1 tablespoon of chopped green onions. The sesame seeds add a nutty aroma and a delightful textural contrast, while the green onions offer a fresh, mild onion flavor and a vibrant pop of color. Serve your Honey Sesame Chicken hot and enjoy the perfect balance of sweet, savory, and crispy!
Conclusion:
And there you have it – your delicious homemade Honey Sesame Chicken! We’ve walked through each step, from marinating the chicken to achieving that perfect sticky glaze. This recipe is incredibly satisfying and provides a wonderful balance of sweet, savory, and slightly nutty flavors, making it a true crowd-pleaser. I encourage you to give it a try; the effort is minimal for such a rewarding result. Imagin extracte serving this beautiful dish at your next family dinner or casual get-together!
For serving suggestions, Honey Sesame Chicken is fantastic over fluffy steamed white or brown rice. A side of steamed broccoli or bok choy adds a refreshing crunch and a pop of color. You could also serve it with noodles or even as a filling for lettuce wraps for a lighter option. Don’t be afraid to experiment with the spice level by adding a pinch of red pepper flakes to the sauce if you enjoy a little heat.
As for variations, feel free to substitute chicken thighs for breasts for an even more tender and flavorful experience. Tossing in some cashews or peanuts towards the end of cooking adds an extra layer of texture. If you’re feeling adventurous, try adding a splash of orange juice to the sauce for a citrusy twist.
Frequently Asked Questions:
Can I make Honey Sesame Chicken ahead of time?
While it’s best enjoyed fresh to maintain the crispiness of the chicken, you can prepare the sauce and marinate the chicken in advance. Store them separately in airtight containers in the refrigerator. When ready to cook, proceed with the recipe as usual. The sauce may thicken upon refrigeration, so you might need to warm it gently before tossing with the cooked chicken.
What can I do if my sauce is too thin?
If your Honey Sesame Chicken sauce turns out thinner than you’d like, you can thicken it by creating a cornstarch slurry. In a small bowl, whisk together 1 tablespoon of cornstarch with 2 tablespoons of cold water until smooth. Pour this slurry into your simmering sauce and stir continuously until it thickens to your desired consistency. This usually takes just a minute or two.
Honey Sesame Chicken – Sweet-Savory Stir-Fry
A delicious and easy recipe for Honey Sesame Chicken, featuring crispy fried chicken coated in a sweet and savory glaze.
Ingredients
-
1 1/2 pounds boneless, skinless chicken breast or thighs, cut into 1-inch pieces
-
1 teaspoon chicken bouillon powder
-
1/2 teaspoon white pepper
-
1 tablespoon water
-
2 large eggs
-
1/2 cup all-purpose flour
-
1/2 cup cornstarch
-
2 teaspoons baking powder
-
1/2 teaspoon salt
-
1/4 cup water
-
2 teaspoons vegetable oil
-
3 tablespoons light soy sauce
-
1 tablespoon oyster sauce
-
2 tablespoons rice vinegar
-
2 tablespoons ketchup
-
3 tablespoons honey
-
1 tablespoon sesame seeds
-
1 tablespoon chopped green onions
-
Vegetable oil, for frying
Instructions
-
Step 1
Marinate chicken pieces with chicken bouillon powder, white pepper, and 1 tablespoon of water. Let sit for 15-30 minutes. -
Step 2
Prepare the batter: Whisk eggs, then combine flour, cornstarch, baking powder, and salt. Add beaten eggs, 1/4 cup water, and 2 teaspoons vegetable oil, whisking until smooth and thick. -
Step 3
Coat marinated chicken pieces in the batter, letting excess drip off, and place on a plate. -
Step 4
Heat 2-3 cups of vegetable oil over medium-high heat. Fry battered chicken in batches for 4-6 minutes until golden brown and cooked through. Drain on a wire rack. -
Step 5
Make the glaze: In a saucepan, combine soy sauce, oyster sauce, rice vinegar, ketchup, and honey. Simmer for 2-3 minutes until slightly thickened. -
Step 6
Add fried chicken to the saucepan with the glaze and toss to coat. Serve immediately, garnished with sesame seeds and green onions.
Important Information
Nutrition Facts (Per Serving)
It is important to consider this information as approximate and not to use it as definitive health advice.
Allergy Information
Please check ingredients for potential allergens and consult a health professional if in doubt.