Oven Roasted Broccoli- Easy Baked Broccoli Recipe
Oven roasted broccoli is, in my humble opinion, one of the unsung heroes of the vegetable world. Forget the soggy, bland broccoli of your childhood – this method transforms humble florets into something truly magical. It’s the kind of dish that converts even the most ardent broccoli skeptics, and for good reason. The high heat of the oven caramelizes the natural sugars in the broccoli, creating those irresistible crispy edges and tender, slightly sweet interiors. What makes oven roasted broccoli so special is its simplicity; a few basic ingredients and a little bit of time unlock a depth of flavor that’s hard to beat. It’s the perfect side dish that pairs beautifully with almost anything, from grilled chicken to a hearty pasta. You’ll find yourself reaching for this oven roasted broccoli recipe again and again because it’s just that darn good!
Oven Roasted Broccoli (Baked Broccoli)
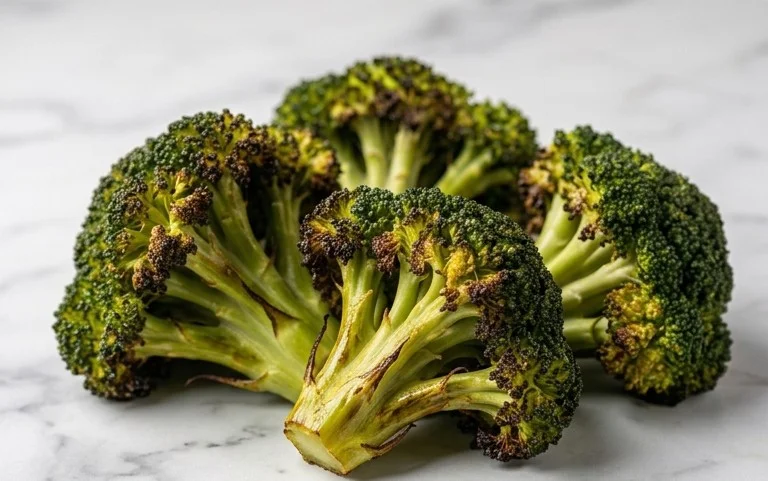
There’s something magical that happens when broccoli meets the heat of a hot oven. Forget the bland, mushy versions of your childhood! Oven-roasted broccoli is a revelation – tender-crisp florets with slightly charred edges, infused with savory garlic and a hint of smoky paprika. It’s incredibly simple to make, requiring just a handful of common ingredients, and it transforms a humble vegetable into a dish so delicious, you’ll want to eat it straight off the baking sheet. This recipe is my go-to for a healthy and flavorful side dish that pairs perfectly with almost any main course, from grilled chicken to pan-seared salmon. Plus, it’s a fantastic way to get picky eaters to enjoy their greens!
Ingredients:
Cooking Instructions:
The beauty of oven-roasted broccoli lies in its simplicity. There’s minimal prep and maximum flavor payoff. Let’s get started on transforming those green trees into crispy, caramelized delights.
1. Prepare Your Broccoli and Preheat Your Oven
First things first, we need to get our broccoli ready and our oven nice and hot. Wash your broccoli thoroughly under cool running water. I like to let them drain in a colander for a few minutes to ensure they’re not dripping wet. If you bought whole heads of broccoli, cut them into uniform, bite-sized florets. Aim for pieces that are roughly the same size so they cook evenly. This means discarding the thick, woody stems or saving them for another use, like making vegetable broth. Once your broccoli is prepped, preheat your oven to a robust 400 degrees Fahrenheit (200 degrees Celsius). A hot oven is key to achieving that desirable crispiness and slightly charred exterior on the broccoli. While the oven is heating, grab a large baking sheet. For easier cleanup later, you can line your baking sheet with parchment paper or aluminum foil, but I find that direct contact with the metal sheet often yields the best browning.
2. Seasoning the Broccoli for Maximum Flavor
Now for the fun part – seasoning! In a large bowl, place your prepared broccoli florets. Drizzle the ¼ cup of olive oil over the broccoli. The olive oil is crucial for coating the florets, helping them to crisp up in the oven and preventing them from drying out. It also acts as a carrier for all those wonderful seasonings. Next, sprinkle on the 1 teaspoon of garlic powder. Garlic powder is a fantastic way to infuse a deep garlic flavor without the risk of burning fresh garlic cloves. Follow this with ½ teaspoon of fine sea salt. Sea salt dissolves nicely and distributes its flavor evenly. Then, add ¼ teaspoon of paprika. This adds a lovely subtle smokiness and a hint of sweetness, enhancing the overall flavor profile. Finally, sprinkle in ¼ teaspoon of freshly ground black pepper for a touch of warmth. Now, get your hands in there! Toss the broccoli gently but thoroughly to ensure every single floret is coated in the oil and spice mixture. This step is vital for even cooking and flavor distribution. Make sure there are no dry spots.
3. Arrangin extractg the Broccoli on the Baking Sheet
Once the broccoli is beautifully coated, it’s time to arrange it on the baking sheet. Spread the seasoned broccoli florets out in a single layer on the prepared baking sheet. This is a critical step for achieving that perfect roasted texture. If you crowd the broccoli, it will steam instead of roast, resulting in mushy, unappetizing florets. You want to give each piece of broccoli enough space to breathe and allow the hot air to circulate around it. If you have too much broccoli for one baking sheet, it’s better to use two baking sheets rather than overcrowding one. This ensures optimal roasting for all the florets. Take a moment to ensure that no florets are piled on top of each other.
4. Roasting to Perfection
With your oven preheated and your broccoli perfectly arranged, it’s time to roast! Carefully place the baking sheet into the hot oven. Roast for 15 to 20 minutes. The exact cooking time will depend on your oven and the size of your broccoli florets. You’ll want to keep an eye on them during the last few minutes. The goal is for the broccoli to be tender when pierced with a fork, with the edges starting to turn a beautiful golden brown and slightly charred. This charring is where all the delicious flavor develops! About halfway through the roasting time, I like to give the baking sheet a good shake or use a spatula to flip the florets. This helps to ensure even browning on all sides. Don’t be afraid of a little char; it adds character and a wonderful depth of flavor to the broccoli.
5. Checking for Doneness and Serving
When your roasted broccoli is looking beautifully caramelized and tender, it’s ready to come out of the oven. Carefully remove the baking sheet from the oven. You can test for doneness by gently piercing a few of the larger florets with a fork. They should be easily pierced but still have a slight bite to them – we’re aiming for tender-crisp, not mushy! If some pieces are more done than others, you can carefully remove the perfectly roasted ones and let the others continue roasting for another minute or two. Serve your oven-roasted broccoli immediately as a delightful side dish. It’s fantastic on its own, or you can sprinkle it with a little extra pinch of salt, a squeeze of fresh lemon juice, or even some grated Parmesan cheese just before serving for an extra pop of flavor. Enjoy this incredibly simple yet unbelievably delicious way to enjoy broccoli!
Conclusion:
So there you have it! My go-to recipe for oven roasted broccoli, also known as baked broccoli, is incredibly simple yet yields a dish that is far superior to any other preparation method. The magic lies in transforming humble broccoli florets into tender-crisp pieces with wonderfully caramelized edges and a nutty, slightly sweet flavor. This method brings out the best in this versatile vegetable, making it a perfect side dish for almost any meal. I love how quickly it comes together, especially on busy weeknights, and the minimal cleanup is a huge bonus. Don’t hesitate to give this delightful baked broccoli a try – I’m confident you’ll be hooked!
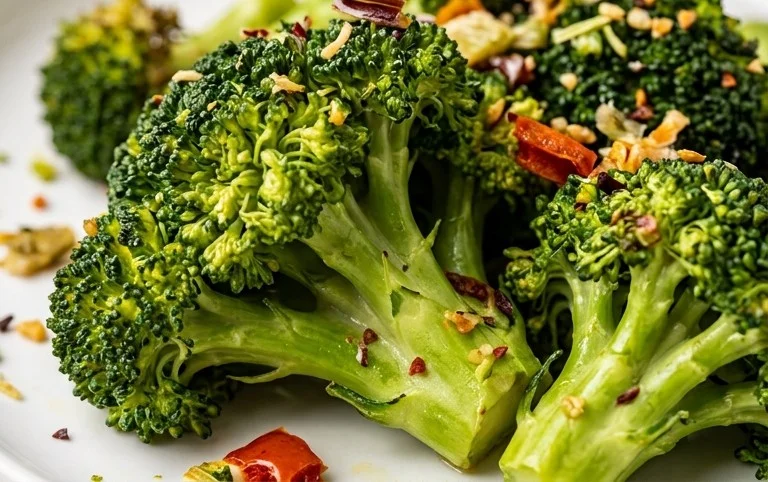
For serving, this oven roasted broccoli is a fantastic accompaniment to grilled chicken or fish, a hearty steak, or even alongside pasta dishes and vegetarian mains. It’s also a wonderful addition to salads, grain bowls, or as a healthy snack on its own. Feel free to get creative with variations! Consider tossing your florets with a pinch of red pepper flakes for a hint of heat, a sprinkle of Parmesan cheese in the last few minutes of roasting, or a drizzle of balsamic glaze after it comes out of the oven. You can also experiment with different herbs like thyme or rosemary.
Frequently Asked Questions:
Why is my oven roasted broccoli not crispy?
To achieve crispy baked broccoli, ensure your florets are dry before tossing them with oil and seasoning. Overcrowding the baking sheet can also lead to steaming rather than roasting. Roast in a single layer and at a sufficiently high temperature (around 400°F or 200°C) for best results.
Can I add other vegetables to this recipe?
Absolutely! This recipe is very adaptable. Heartier vegetables like carrots or Brussels sprouts can be added, but may require a slightly longer roasting time. Softer vegetables like bell peppers or onions can be added halfway through the broccoli’s roasting time.
What kind of oil should I use for oven roasted broccoli?
A neutral-flavored oil with a high smoke point, such as olive oil or avocado oil, is ideal. These oils allow the broccoli to roast properly without burning.
Oven Roasted Broccoli (Baked Broccoli)
Simple and delicious oven-roasted broccoli with garlic, salt, paprika, and pepper. A healthy and easy side dish.
Ingredients
-
8 cups fresh broccoli florets ((1.5 pounds (24 ounces broccoli) cut into bite-sized pieces))
-
1/4 cup olive oil
-
1 teaspoon garlic powder
-
1/2 teaspoon fine sea salt
-
1/4 teaspoon paprika
-
1/4 teaspoon freshly ground black pepper
Instructions
-
Step 1
Preheat oven to 400°F (200°C). -
Step 2
Wash and thoroughly dry the broccoli florets. -
Step 3
In a large bowl, toss the broccoli florets with olive oil, garlic powder, sea salt, paprika, and black pepper until evenly coated. -
Step 4
Spread the seasoned broccoli in a single layer on a baking sheet. -
Step 5
Roast for 15-20 minutes, or until tender-crisp and slightly browned at the edges. -
Step 6
Serve hot.
Important Information
Nutrition Facts (Per Serving)
It is important to consider this information as approximate and not to use it as definitive health advice.
Allergy Information
Please check ingredients for potential allergens and consult a health professional if in doubt.