Easy Homemade Bread Recipe- Deliciously Simple Baking
Homemade bread is more than just a food; it’s an experience. There’s a primal satisfaction, a deep comfort, that comes from transforming simple ingredients like flour, water, yeast, and salt into a warm, crusty loaf. The aroma that wafts through your kitchen as it bakes is pure magic, a fragrant invitation to gather and connect. People are drawn to homemade bread for so many reasons. It’s the unparalleled freshness, the absence of preservatives, and the joy of knowing exactly what went into every bite. It’s the slightly chewy interior, the satisfying crunch of the crust, and the sheer versatility – perfect for a simple slice of toast, a hearty sandwich, or as the base for your favorite toppings.
Why You’ll Love This Recipe
Embark on your baking journey with confidence!
This recipe demystifies the process of creating truly exceptional homemade bread. We’ll guide you step-by-step, ensuring a delicious outcome even for begin extractners. What makes this particular recipe special is its focus on achieving that perfect balance of soft crum extractb and crackling crust, using techniques that are both effective and easy to master. Get ready to impress yourself and your loved ones with your very own artisanal loaf.
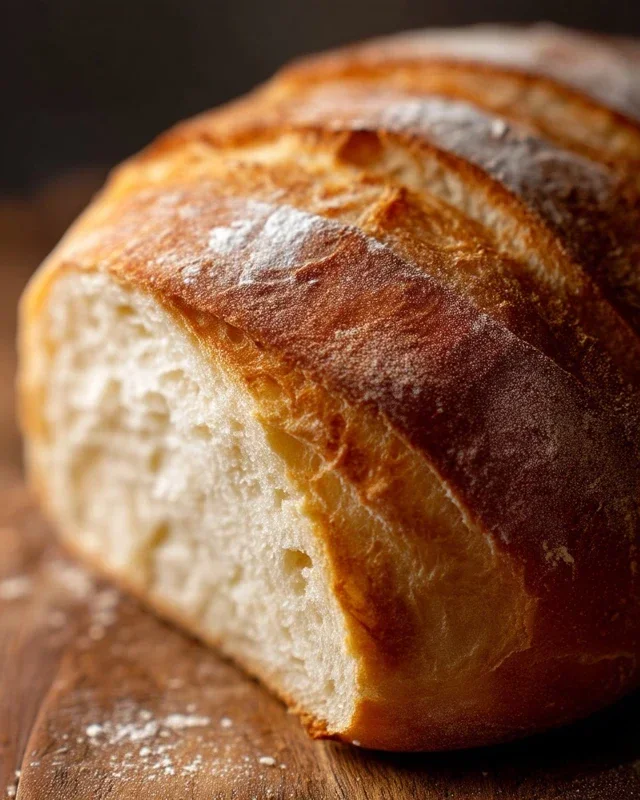
Homemade Bread
There’s something incredibly satisfying about pulling a golden-brown, perfectly risen loaf of homemade bread from your oven. The aroma that fills your kitchen is non-intoxicating, and the taste… well, it’s miles beyond anything you can buy at the store. Forget those dense, flavorless loaves; we’re talking about soft, airy interiors with a delightful crust. Making bread from scratch might seem intimidating, but I promise you, it’s a straightforward process that rewards your effort tenfold. With a few basic ingredients and a little patience, you’ll be baking bread like a pro in no time. This recipe is a fantastic starting point, yielding a versatile white bread that’s perfect for sandwiches, toast, or simply enjoying with a smear of butter.
Ingredients:
Instructions:
The magic of bread making begin extracts with activating the yeast. In a large mixing bowl, combine the warm water and your chosen sweetener (honey or sugar). Sprinkle the active dry yeast over the top. Now, this is crucial: the water temperature is key. Too hot and you’ll kill the yeast, too cold and it won’t activate properly. Aim for that 105-115 degree Fahrenheit range, which feels comfortably warm, like bathwater. Let this mixture sit undisturbed for about 5-10 minutes. You should start to see a foamy, bubbly layer form on the surface. This tells you your yeast is alive and ready to work its wonders, creating those airy pockets in your bread. If you don’t see any foam, your yeast might be old or the water temperature was off, so it’s best to start over.
Once your yeast is happily frothing, it’s time to add the other foundational ingredients. Gently stir in the salt and oil. Salt not only adds flavor but also helps to control the yeast’s fermentation process, ensuring a more even rise. The oil adds a touch of tenderness to the final crum extractb. Now, we begin extract the process of incorporating the flour. Add about 4 cups of the flour to the wet ingredients. If you’re using bread flour, you’ll notice a slightly higher protein content, which contributes to a chewier texture and better structure in your bread. All-purpose flour works beautifully too, producing a softer loaf.
Kneading the Dough: The Heart of Bread Making
This is where the real workout begin extracts, and it’s incredibly rewarding. Using a sturdy wooden spoon or a dough whisk, start mixing the ingredients until a shaggy dough begin extracts to form. Once it’s too thick to stir easily, it’s time to get your hands in there. Turn the dough out onto a lightly floured surface. If you’re using a stand mixer with a dough hook, you can add the flour gradually to the mixer bowl and let it do the kneading for you.
Kneading develops the gluten in the flour, which is essential for the bread’s structure and chegrape juicess. Push, pull, and fold the dough repeatedly. It will be sticky and messy at first, but don’t be tempted to add too much extra flour right away – a little stickiness is good! Gradually add more flour, about a quarter cup at a time, as needed, until the dough is no longer sticking to your hands or the counter. It should feel smooth, elastic, and slightly tacky. Continue kneading for about 8-10 minutes by hand, or 6-8 minutes with a stand mixer on medium speed. You’ll know you’ve kneaded enough when the dough springs back slowly after being gently pressed with a finger.
First Rise: Letting the Dough Do Its Work
Once your dough is beautifully kneaded, it’s time for its first nap. Lightly grease a clean bowl with a little oil. Place the dough in the bowl, turning it to coat all sides with oil. Cover the bowl tightly with plastic wrap or a clean kitchen towel. Find a warm, draft-free spot for your dough to rise. This could be in a slightly warmed oven (turned off, of course!), on top of your refrigerator, or simply in a warm corner of your kitchen. Let the dough rise for 1 to 1.5 hours, or until it has doubled in size. This is the yeast doing its magic, creating carbon dioxide gas that expands the dough.
Shaping Your Loaf: The Final Touches
When the dough has doubled in size, gently punch it down to release the air. Turn the dough out onto a lightly floured surface again. At this stage, you can shape your bread however you like! For a classic loaf, gently shape the dough into a round or oblong shape that will fit into your greased loaf pan. Be gentle; you don’t want to deflate all the air you’ve worked so hard to create. Once shaped, place the dough into your prepared loaf pan. Cover it again and let it rise for a second time, for about 30-45 minutes, until it looks puffy and has almost reached the top of the pan.
Baking to Golden Perfection
Preheat your oven to 375 degrees Fahrenheit (190 degrees Celsius) during the last 15 minutes of the second rise. Once the oven is hot and the dough has had its second rise, it’s time for the oven! Carefully place the loaf pan in the preheated oven. Bake for 30-40 minutes, or until the crust is a beautiful golden brown and the loaf sounds hollow when tapped on the bottom. If the top starts to brown too quickly, you can loosely tent it with aluminum foil.
The aroma that wafts from your oven as this bread bakes is truly one of life’s simple pleasures. Once baked, carefully remove the bread from the pan and place it on a wire rack to cool completely. This is arguably the hardest part – resisting the urge to slice into it immediately! Letting it cool allows the internal structure to set, ensuring a perfect texture. Enjoy your delicious, homemade bread!
Conclusion:
Making homemade bread is a truly rewarding experience, and this recipe makes it surprisingly accessible for bakers of all levels. The beauty of this approach lies in its simplicity, yielding a perfectly crusty exterior and a wonderfully soft, airy interior that store-bought loaves simply can’t match. The aroma filling your kitchen as it bakes is an added bonus that makes all the effort worthwhile. Don’t be intimidated; the process is straightforward and incredibly satisfying. So, gather your ingredients, embrace the hands-on nature of baking, and discover the joy of crafting your own delicious, fresh bread.
This versatile loaf is fantastic served warm with a generous slathering of butter, alongside hearty soups and stews, or as the base for decadent French toast. Feel free to experiment with variations! Add in herbs like rosemary or thyme to the dough for an aromatic twist, or incorporate a handful of cheese for a savory delight. You can even try mixing in seeds like sunflower or poppy for added texture and flavor. I truly encourage you to give this homemade bread recipe a try; the results are incredibly delicious and the satisfaction of pulling your own perfect loaf from the oven is unparalleled.
Frequently Asked Questions
Why is my bread dense instead of fluffy?
A dense loaf often results from not allowing the dough to rise sufficiently or from overworking it after the initial kneading. Ensure your yeast is active by proofing it first in warm liquid. Allow the dough to double in size in a warm place before shaping and again before baking. Avoid over-kneading; stop when the dough is smooth and elastic.
Can I substitute different types of flour?
Yes, you can! While all-purpose flour works beautifully, you can experiment with adding a portion of whole wheat flour for a nuttier flavor and added fiber. Keep in mind that whole wheat flour absorbs more liquid, so you might need to adjust the water slightly. For gluten-free options, specialized gluten-free bread flour blends are recommended for best results.
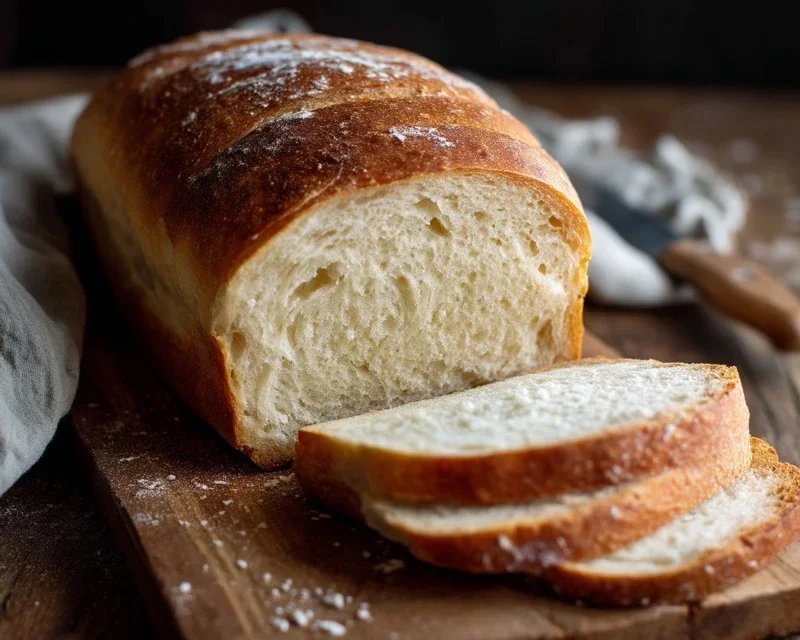
Homemade Bread
A classic recipe for delicious, homemade bread from scratch. Perfect for sandwiches, toast, or as a side dish.
Ingredients
-
2 cups warm water (105-115 degrees) ((474g))
-
1 Tablespoons active dry yeast*
-
1/4 cup honey ((85g))
-
2 teaspoons salt
-
2 Tablespoons canola oil ((30 ml))
-
4 – 5 1/2 cups all-purpose flour* ((500g-688g))
Instructions
-
Step 1
In a large bowl, combine the warm water and honey. Sprinkle the yeast over the top and let it sit for about 5-10 minutes, until foamy. -
Step 2
Stir in the salt and oil. -
Step 3
Gradually add the flour, starting with 4 cups, mixing until a shaggy dough forms. If the dough is too sticky, add more flour, about 1/4 cup at a time, until it pulls away from the sides of the bowl. -
Step 4
Turn the dough out onto a lightly floured surface and knead for 8-10 minutes, until smooth and elastic. Alternatively, use a stand mixer with a dough hook. -
Step 5
Place the dough in a lightly oiled bowl, turning to coat. Cover with plastic wrap or a damp towel and let it rise in a warm place for 1 to 1.5 hours, or until doubled in size. -
Step 6
Punch down the dough and shape it into a loaf. Place it in a greased loaf pan. -
Step 7
Cover the loaf pan and let the dough rise again for 30-45 minutes. -
Step 8
Preheat your oven to 375°F (190°C). Bake for 30-35 minutes, or until the crust is golden brown and the internal temperature reaches 200-210°F (93-99°C). -
Step 9
Remove the bread from the pan and let it cool completely on a wire rack before slicing.
Important Information
Nutrition Facts (Per Serving)
It is important to consider this information as approximate and not to use it as definitive health advice.
Allergy Information
Please check ingredients for potential allergens and consult a health professional if in doubt.