Blue Moon Ice Cream- Easy Homemade Recipe
Blue Moon Ice Cream is more than just a dessert; it’s a vibrant, nostalgic journey for many. Have you ever craved that electric blue hue and a flavor that dances between sweet almond and a hint of citrus? That’s the magic of Blue Moon Ice Cream, a Midwestern legend that sparks joy and curiosity in equal measure. What makes this ice cream so beloved? It’s the unpretentious, almost whimsical nature of it. Unlike complex gourmet flavors, Blue Moon ice cream is pure, unadulterated fun. Its distinctive color alone is enough to transport you back to childhood summers, carefree days, and the simple pleasure of a perfectly scooped cone. We’ll dive into how you can recreate this iconic taste and color in your own kitchen, proving that sometimes, the most extraordinary treats are also the simplest. Get ready to unlock the secrets to your own batch of unforgettable Blue Moon Ice Cream!
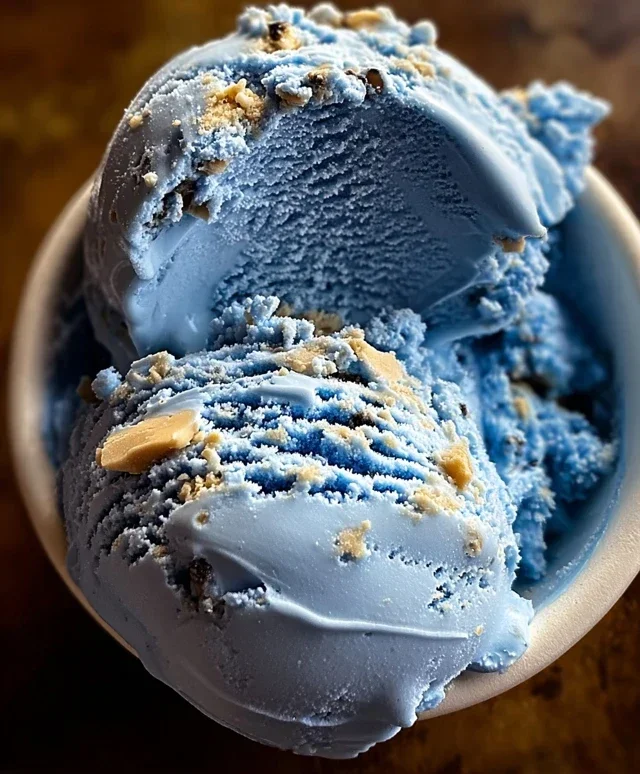
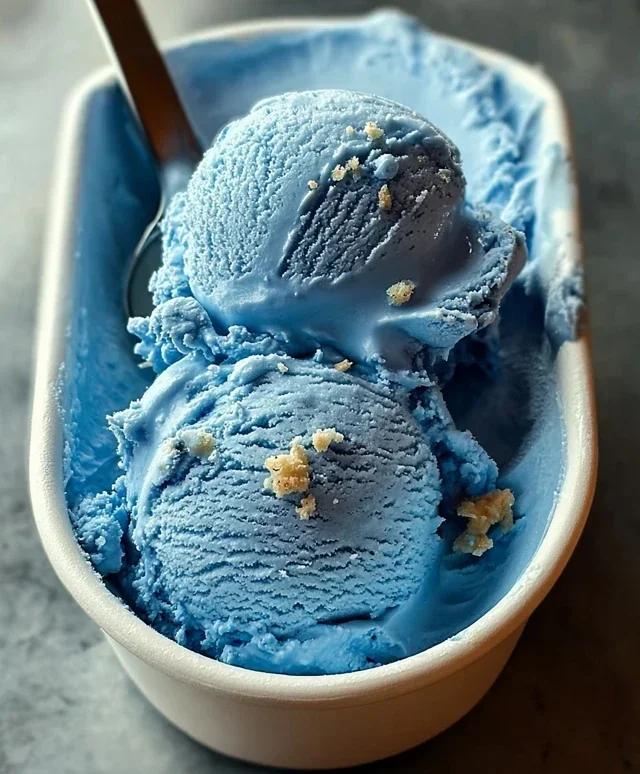
Blue Moon Ice Cream
There’s something undeniably magical about a scoop of Blue Moon ice cream. It’s a flavor that sparks curiosity and joy, often evoking childhood memories of summer fairs and carefree days. Unlike many ice creams that rely on recognizable fruits or chocolates, Blue Moon’s charm lies in its mystery. Is it blue raspberry? Is it a secret blend of berries? The truth is, the exact flavor profile can vary, but its signature vibrant blue hue and sweet, slightly fruity, and sometimes nutty notes are unmistakable. Creating this whimsical treat at home is surprisingly simple, allowing you to bring a touch of that playful enchantment directly to your freezer. Forget those store-bought tubs; this homemade version is richer, creamier, and perfectly tailored to your liking. Let’s dive into how we can create our own batch of this beloved, iconic ice cream.
Ingredients:
Crafting the Creamy Base
The foundation of any exceptional ice cream is a well-balanced custard or, in this case, a simpler, no-cook base that relies on the richness of dairy. We’re starting with heavy cream and whole milk. The heavy cream is crucial for achieving that luxurious, smooth texture that melts perfectly on your tongue. Whole milk provides the necessary liquid while contributing to the overall creamy consistency without making it too heavy.
Sweetening the Deal
Granulated sugar is our primary sweetener. The 3/4 cup is a good starting point, offering sweetness without overpowering the delicate almond and vanilla notes. You can adjust this slightly based on your personal preference, but remember that ice cream tends to taste less sweet when frozen, so don’t be tempted to reduce it too much.
The Aromatic Essence
Vanilla extract is a classic for a reason. It adds warmth and depth to almost any dessert, and Blue Moon is no exception. It acts as a subtle enhancer, rounding out the flavors. The real secret weapon for that distinctive Blue Moon taste, however, is the almond extract. A little goes a long way, providing a delicate, slightly nutty, and almost amaretto extract-like undertone that sets this ice cream apart. Be mindful when measuring almond extract; it can be quite potent.
The Signature Hue
Blue food coloring is what truly transforms our creation into Blue Moon. The amount needed will depend on the intensity of the coloring you use and the shade you desire. A little bit of blue will create a pnon-alcoholic ale, sky-blue, while a few more drops will give you that iconic, vibrant, electric blue. Gel food coloring is often more concentrated and provides a richer color than liquid versions.
The Optional Cherry Surprise
Chopped maraschino cherries are an optional but delightful addition. They add little pockets of sweet, slightly tart fruitiness and a beautiful pop of red against the blue. They also contribute to the often-fruity perception of the Blue Moon flavor. Make sure to drain them well and chop them into small pieces so they distribute evenly throughout the ice cream and don’t freeze into hard, unmanageable chunks.
Getting Started: Combining the Elements
1. In a large bowl, combine the heavy cream, whole milk, and granulated sugar. Whisk these ingredients together thoroughly until the sugar is completely dissolved. This step is important to ensure a smooth texture and prevent any grainy sugar crystals from forming in your finished ice cream. You’ll notice the mixture starts to thicken slightly as the sugar dissolves and integrates with the dairy.
2. Add the vanilla extract and almond extract to the bowl. Whisk again until they are evenly distributed. Take a moment to appreciate the lovely aroma that’s starting to develop. This fragrant blend is the heart of our Blue Moon flavor.
3. Now, it’s time to add the color. Start by adding just a drop or two of blue food coloring. Stir well and observe the color change. Continue adding food coloring, a drop at a time, and mixing thoroughly after each addition, until you achieve your desired shade of blue. Remember that the color will lighten slightly once the ice cream is frozen. Aim for a color that makes you smile!
4. If you’ve decided to include them, gently fold in the chopped maraschino cherries at this stage. Stir just enough to distribute them evenly throughout the mixture without overmixing, which could break them down too much.
Churning the Magic
This is where the transformation into ice cream truly begin extracts. The method you use will depend on your ice cream maker.
The Final Freeze: Hardening Your Creation
Once your ice cream has reached a soft-serve consistency from churning or the no-churn method, it’s time for the final freeze. Transfer the ice cream to an airtight container and place it in the freezer for at least 4-6 hours, or preferably overnight, to harden completely. This allows the flavors to meld and the ice cream to reach that perfect scoopable firmness. Enjoy your homemade Blue Moon ice cream!
Conclusion:
And there you have it – your very own Blue Moon Ice Cream! This recipe is a guaranteed hit because it’s surprisingly simple to achieve that iconic vibrant blue hue and subtly sweet, unique flavor that has captivated ice cream lovers for years. Forget the store-bought stuff; this homemade version delivers superior taste and an unforgettable visual appeal. It’s perfect for parties, summer gatherings, or just a delightful treat to brighten your day. Don’t hesitate to experiment with the suggested variations to make it uniquely yours. I truly encourage you to give this Blue Moon Ice Cream recipe a try; the satisfaction of creating such a special dessert from scratch is immense.
For serving, this ice cream shines on its own, but consider pairing it with a sprinkle of edible glitter for extra sparkle, or as a topping for a classic pound cake. It also makes a fantastic base for a decadent milkshake.
Frequently Asked Questions:
Can I make this without an ice cream maker?
Absolutely! While an ice cream maker provides the smoothest texture, you can achieve a delicious Blue Moon Ice Cream using the no-churn method. Simply whip your cream and condensed milk together, then fold in the flavorings and food coloring. Freeze in a loaf pan, stirring vigorously every hour for the first few hours to break up ice crystals.
What gives Blue Moon Ice Cream its distinctive flavor?
The signature flavor of Blue Moon Ice Cream is a bit of a mystery and varies slightly by maker, but it’s commonly described as a blend of almond extract and a hint of citrus, sometimes with a touch of vanilla. The key is to find a balance that you enjoy.
Are there other color options besides blue?
While blue is traditional, you can certainly get creative! Feel free to use other food coloring to create your own “galaxy” or “unicorn” themed ice cream by swirling in different colors. The base flavor remains delicious regardless of the color.
Blue Moon Ice Cream
A vibrant and uniquely flavored ice cream with a creamy texture and a hint of almond, inspired by the classic “Blue Moon” flavor profile. Perfect for a fun and refreshing treat.
Ingredients
-
2 cups heavy cream
-
1 cup whole milk
-
3/4 cup granulated sugar
-
1 teaspoon vanilla extract
-
1 teaspoon almond extract
-
Blue food coloring, as needed
-
1/4 cup maraschino cherries, chopped (optional)
Instructions
-
Step 1
In a medium bowl, whisk together the granulated sugar, vanilla extract, and almond extract until the sugar is mostly dissolved. -
Step 2
In a separate large bowl, combine the heavy cream and whole milk. Gradually add the sugar mixture to the cream and milk, whisking until well combined. -
Step 3
Add blue food coloring a few drops at a time, stirring after each addition, until the desired shade of blue is achieved. Be careful not to over-color. -
Step 4
If using, stir in the chopped maraschino cherries. -
Step 5
Pour the ice cream base into your ice cream maker and churn according to the manufacturer’s instructions. -
Step 6
Once churned, transfer the ice cream to an airtight container and freeze for at least 4 hours, or until firm.
Important Information
Nutrition Facts (Per Serving)
It is important to consider this information as approximate and not to use it as definitive health advice.
Allergy Information
Please check ingredients for potential allergens and consult a health professional if in doubt.